How to Connect a Notion Project
Notion is a popular platform for organizing documents and tracking tasks. This guide helps users connect a Notion Project to Enji to ensure our platform can collect essential data.
Template Installation
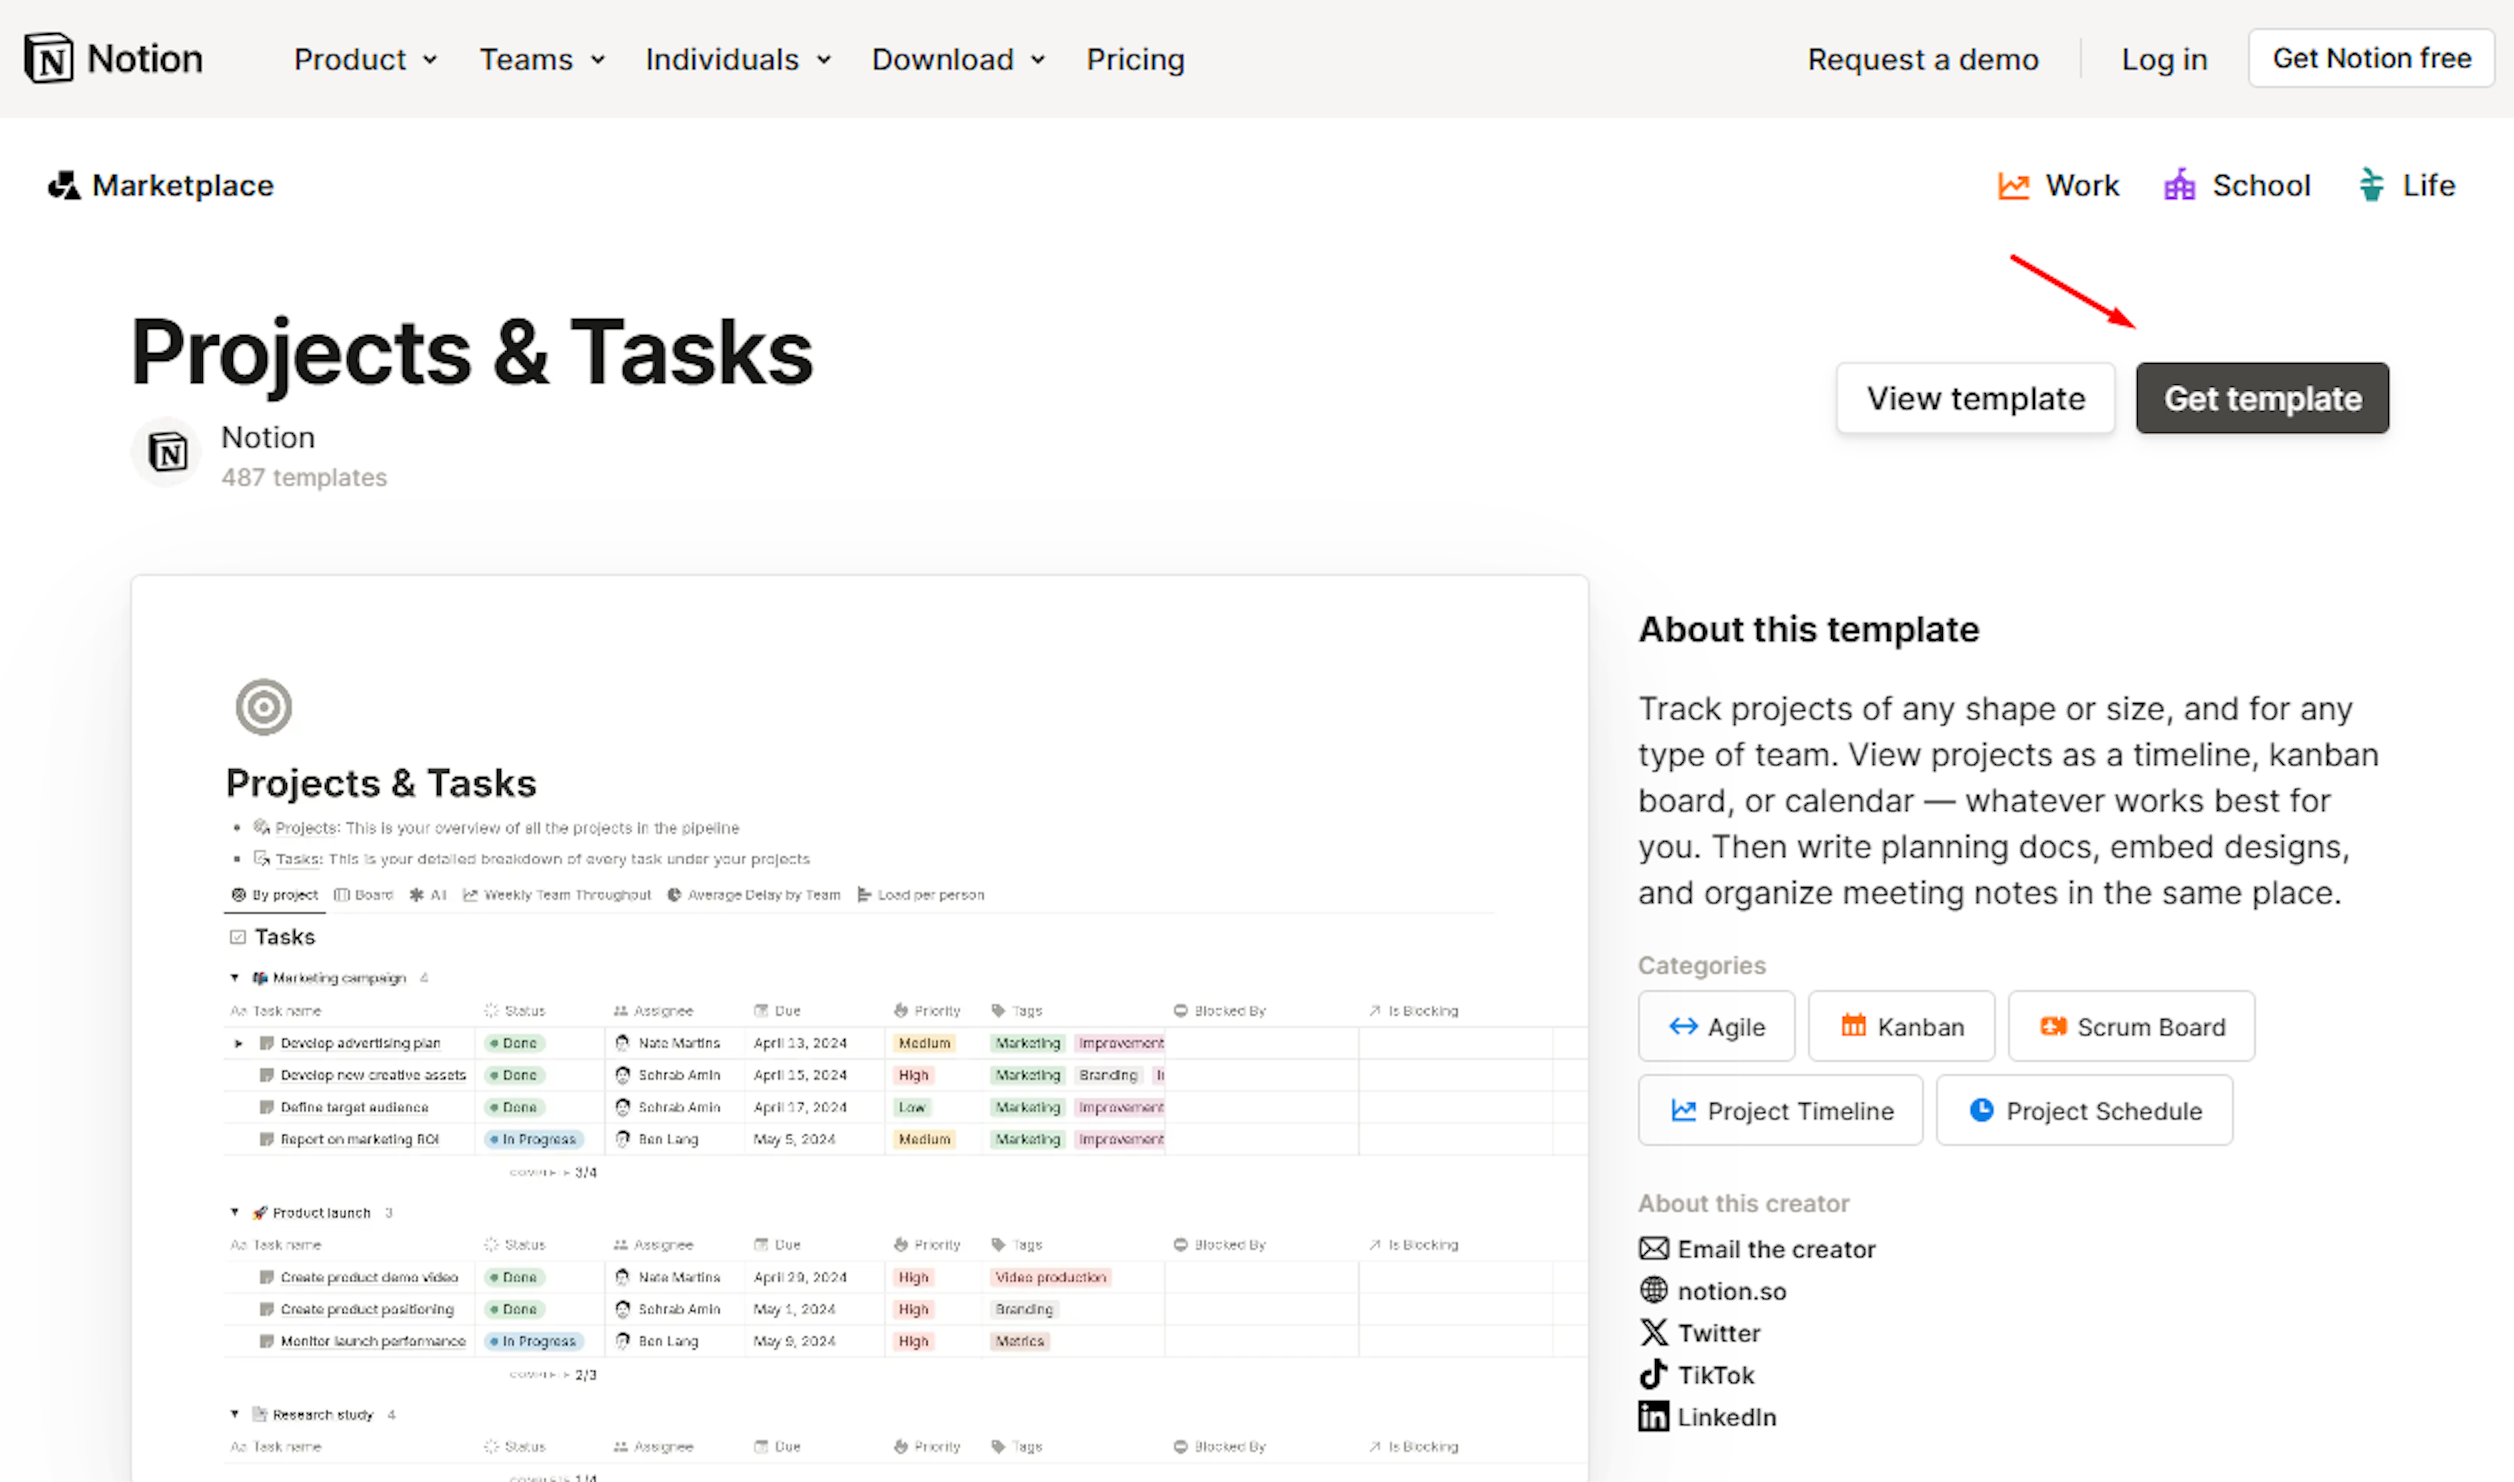
1. Open the Projects & Tasks link in a browser and click Get Template.
This integration works exclusively with the Projects & Tasks template from Notion. Custom templates are not supported!
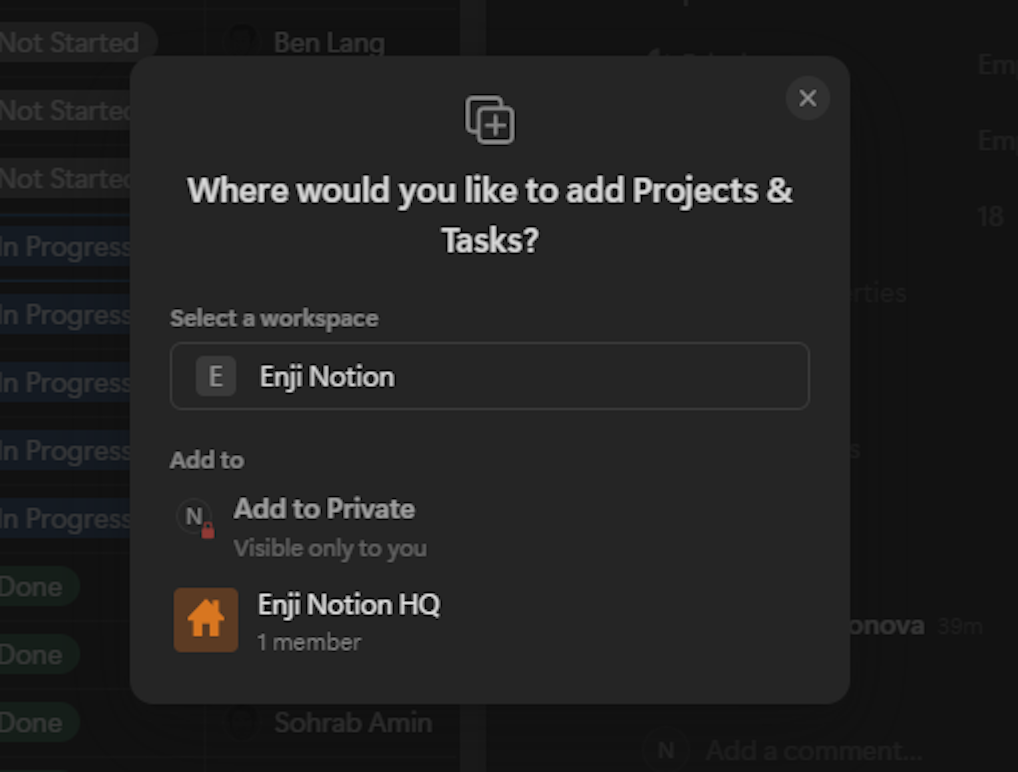
2. Select the Notion Workspace where the template will be applied.
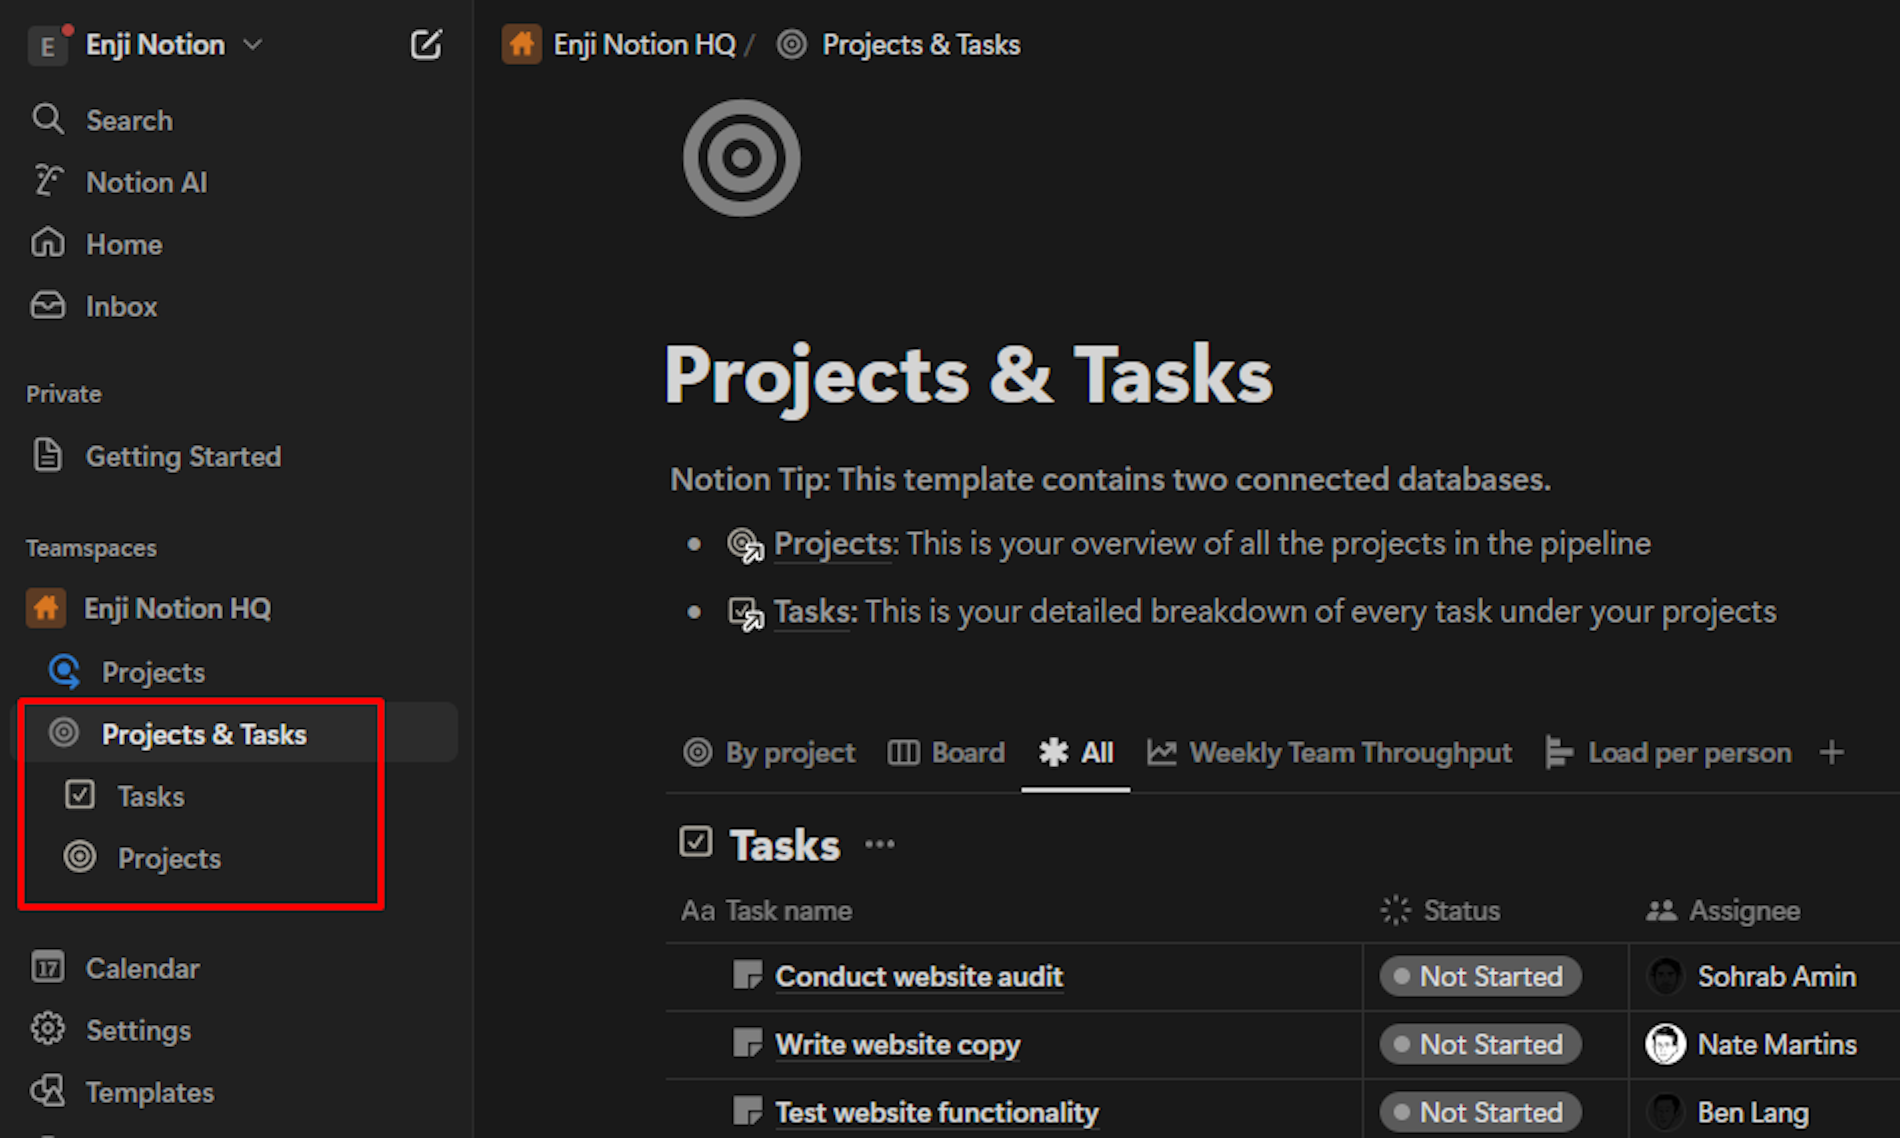
The template will be applied automatically, adding a Projects & Tasks section with Notion’s default flow settings.
Creating a token
Creating Enji integration
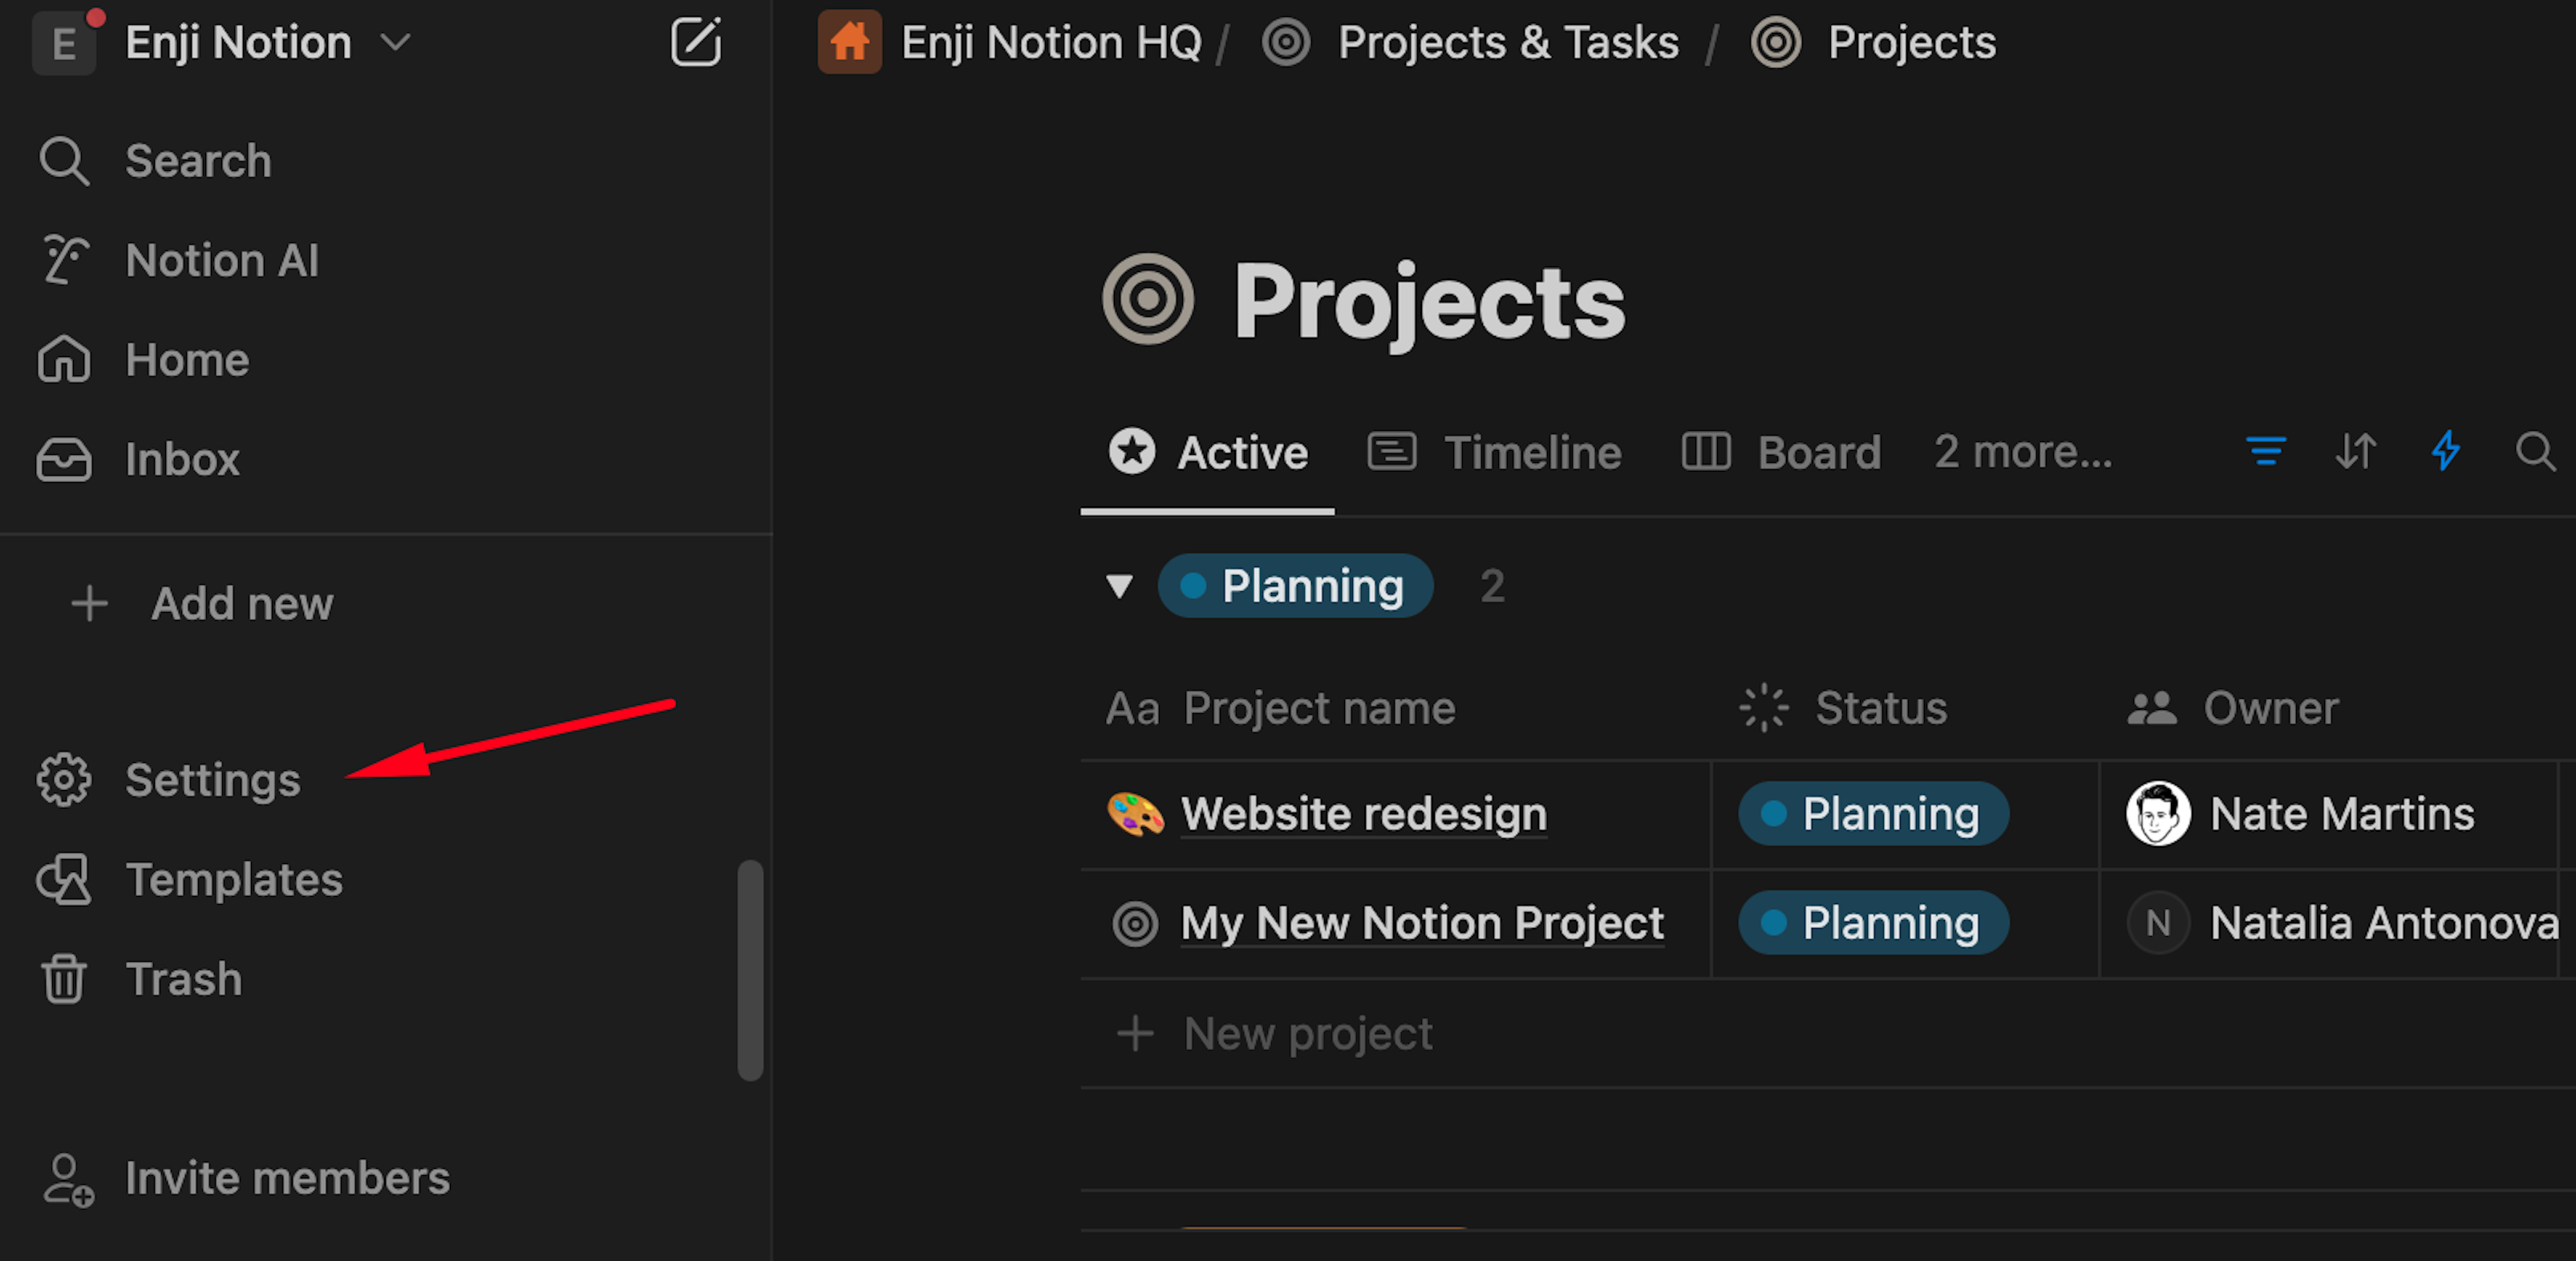
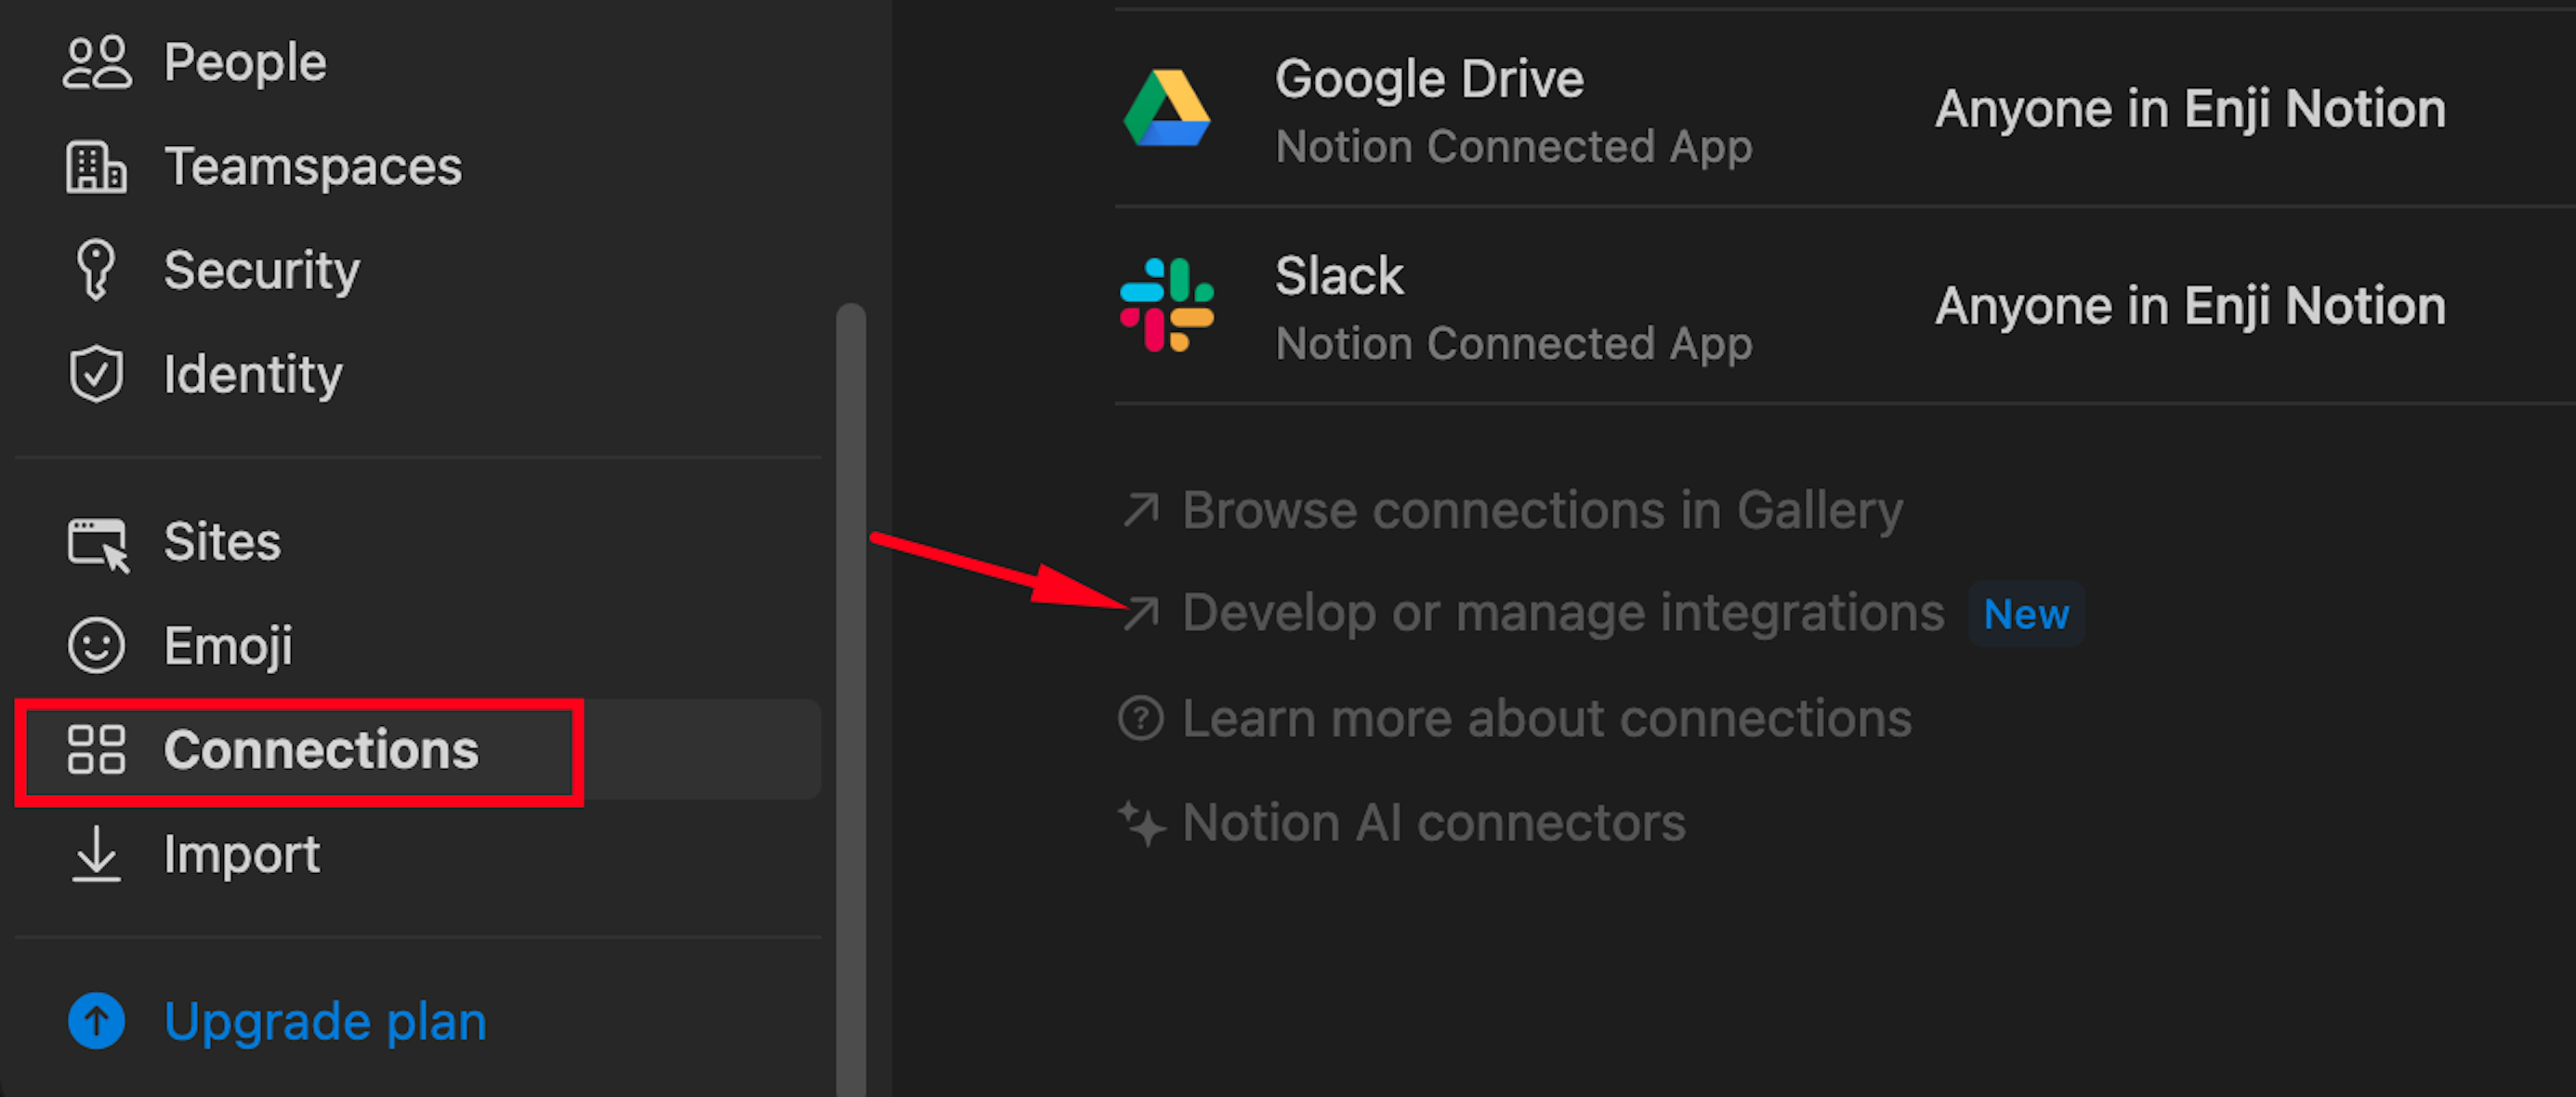
1. On the main page of the Notion workspace, select the "Settings & members" section from the main menu.
2. Open Connections -> Develop or manage integrations.
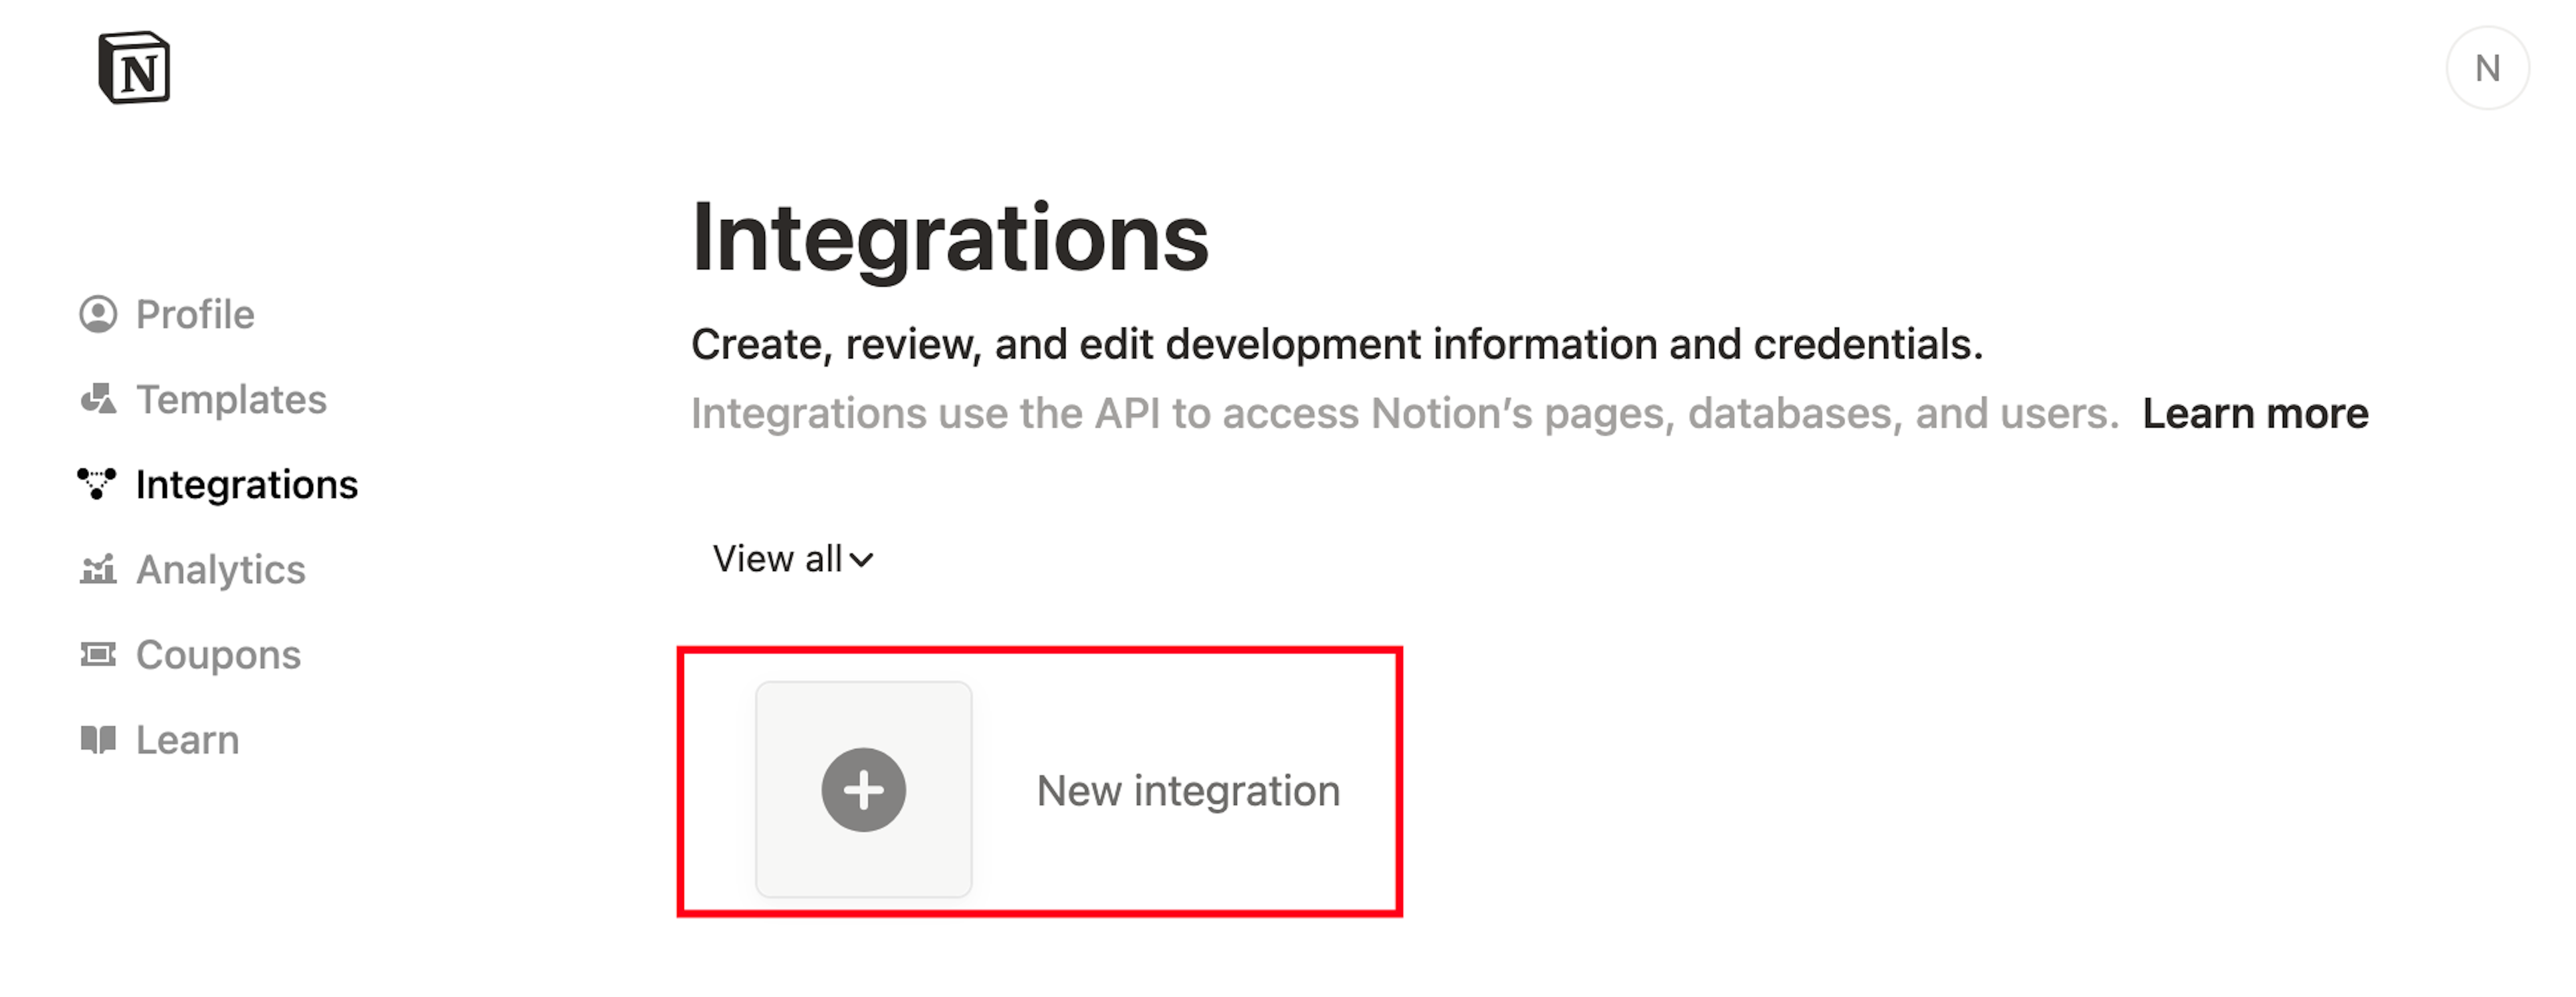
3. A new tab will open the Integrations page. Select "New integration."
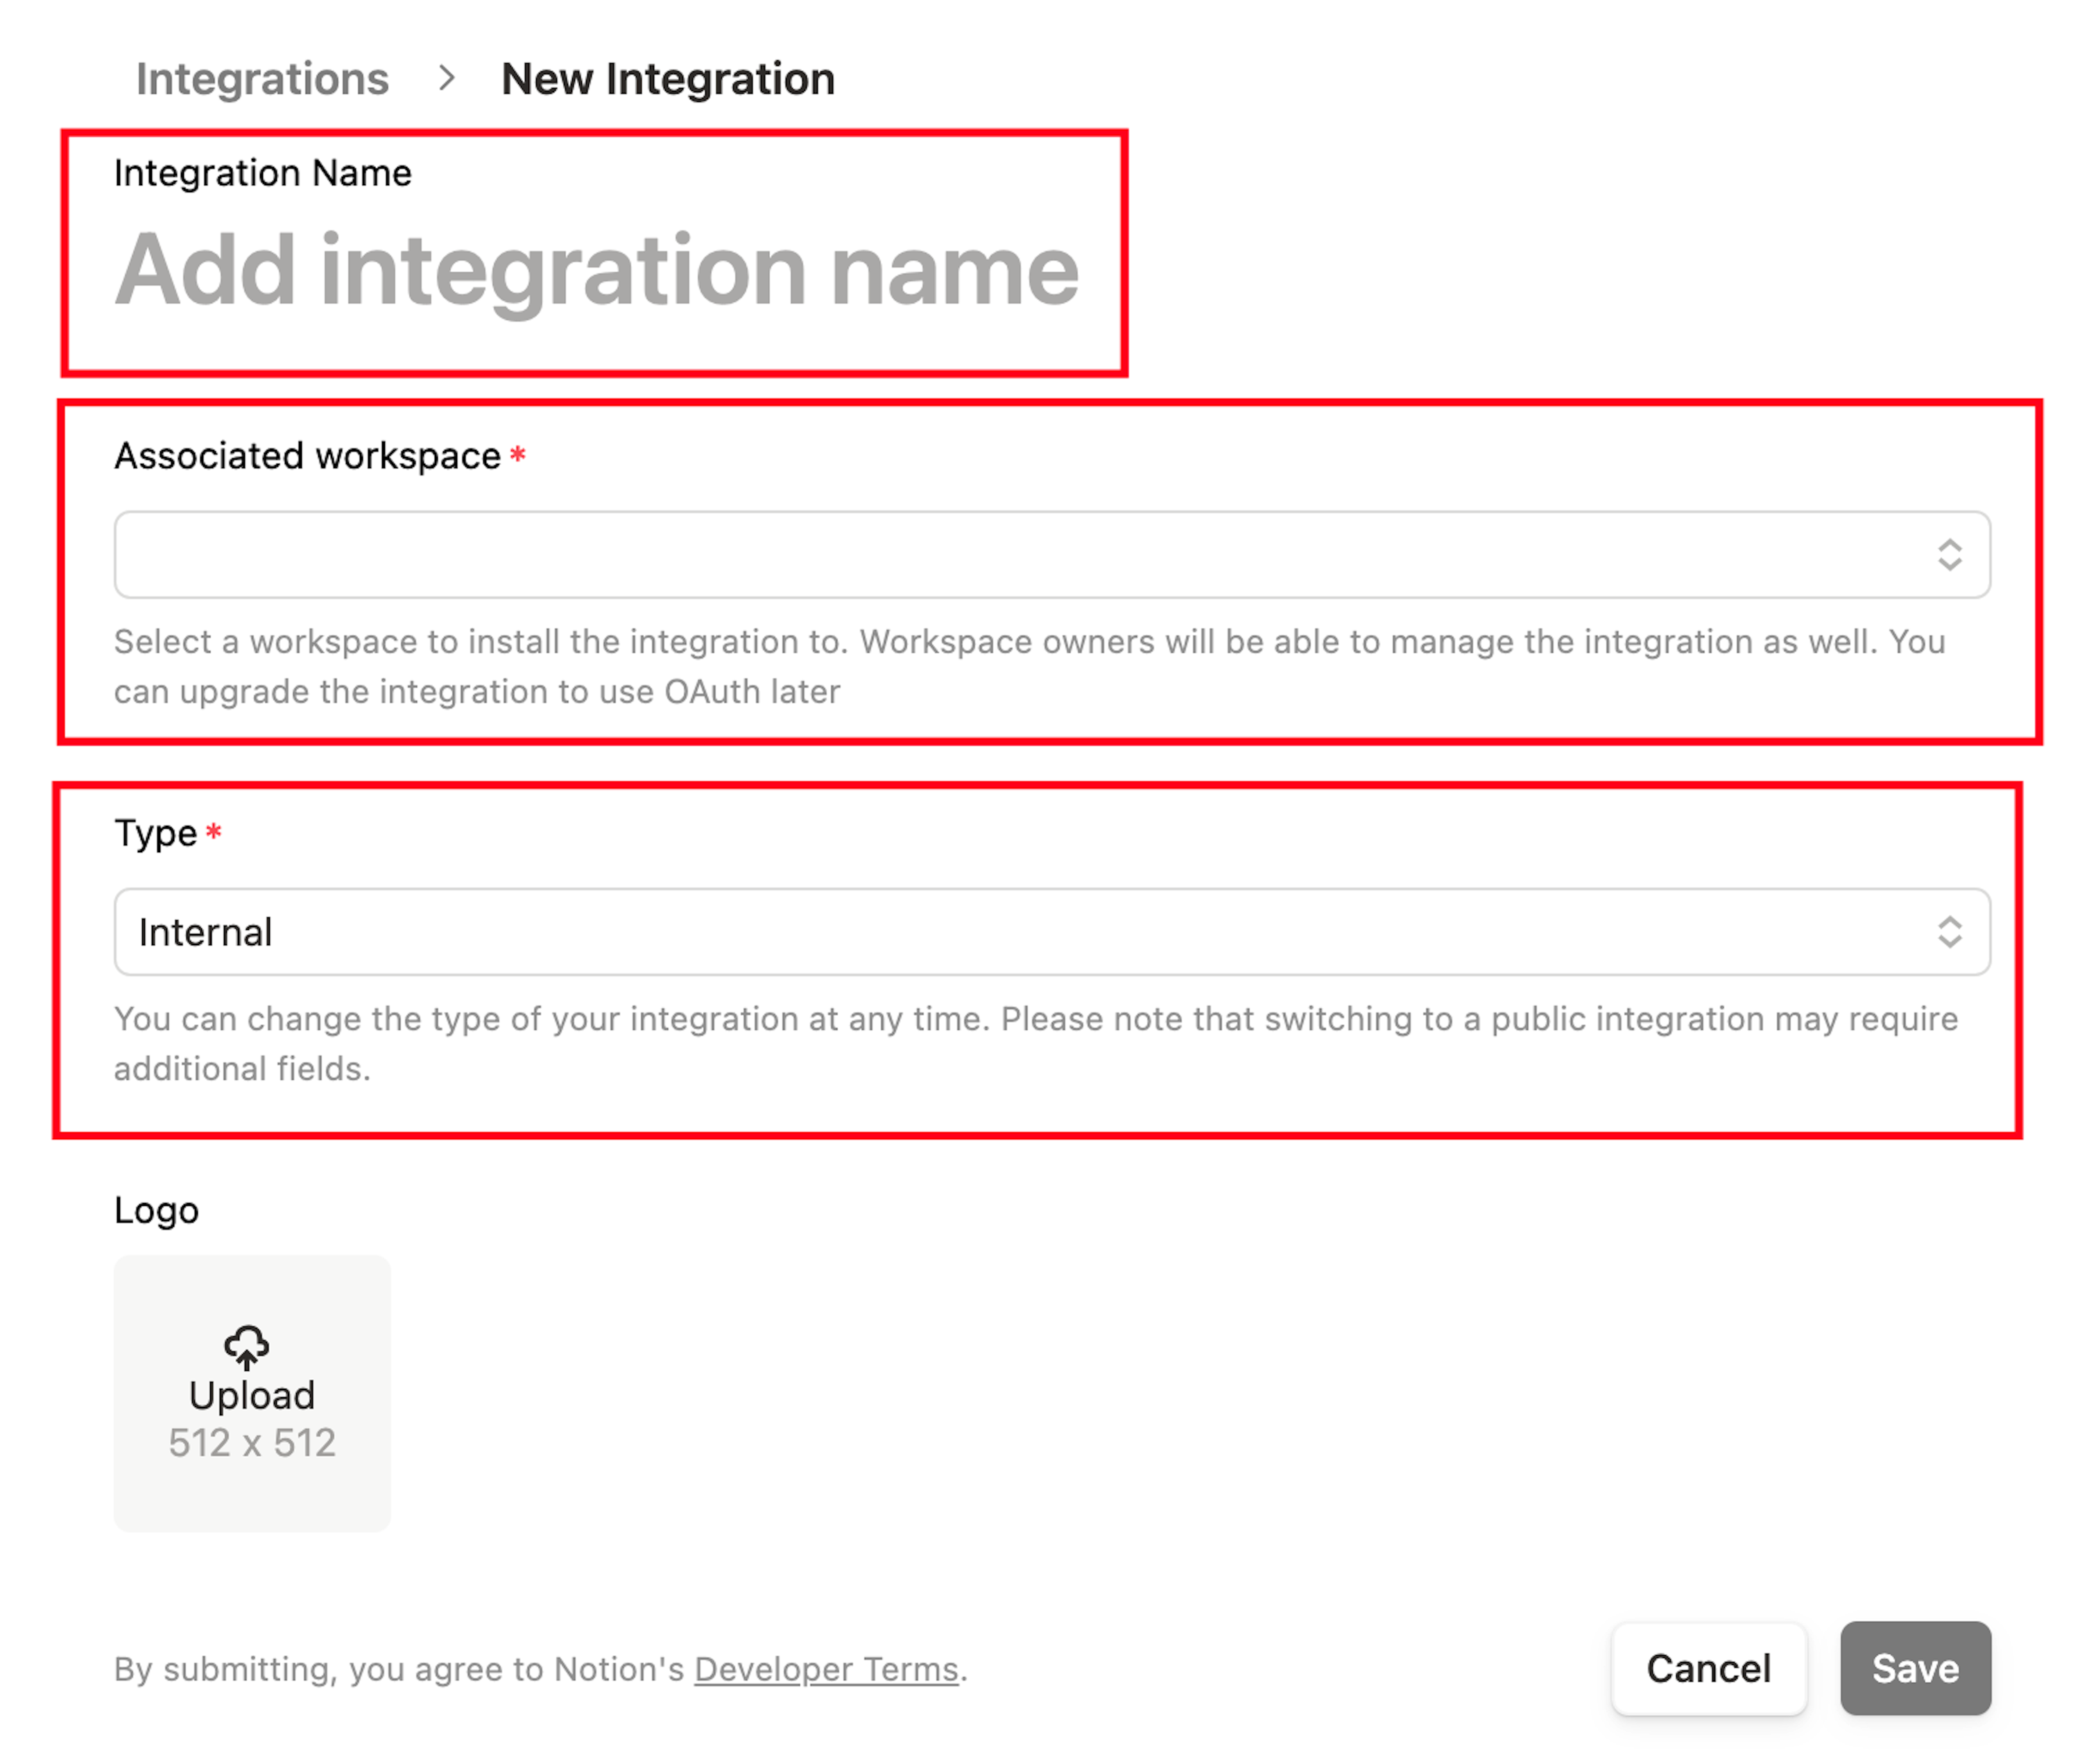
4. Complete the fields:
- Add integration name: Name the integration with Enji.
- Associated workspace: Indicate Notion Workspaces the Enji integration should work with.
- Type: Select Internal.
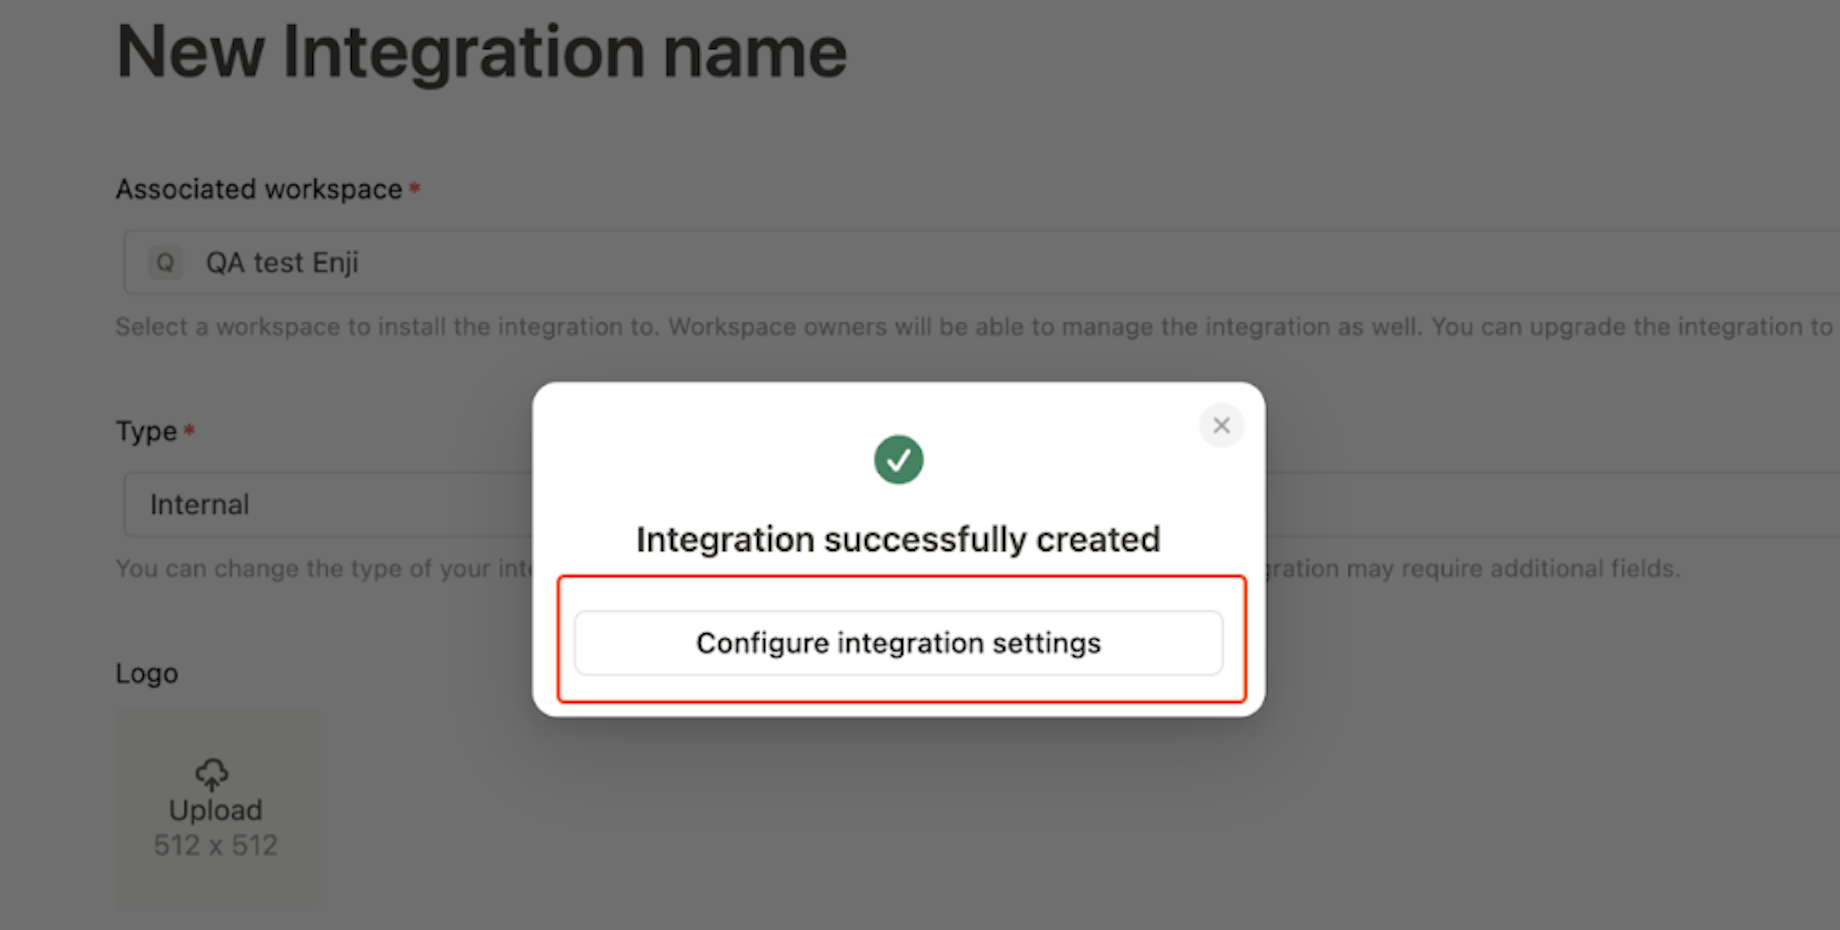
5. Click "Save" and proceed to the Configure Integration Settings.
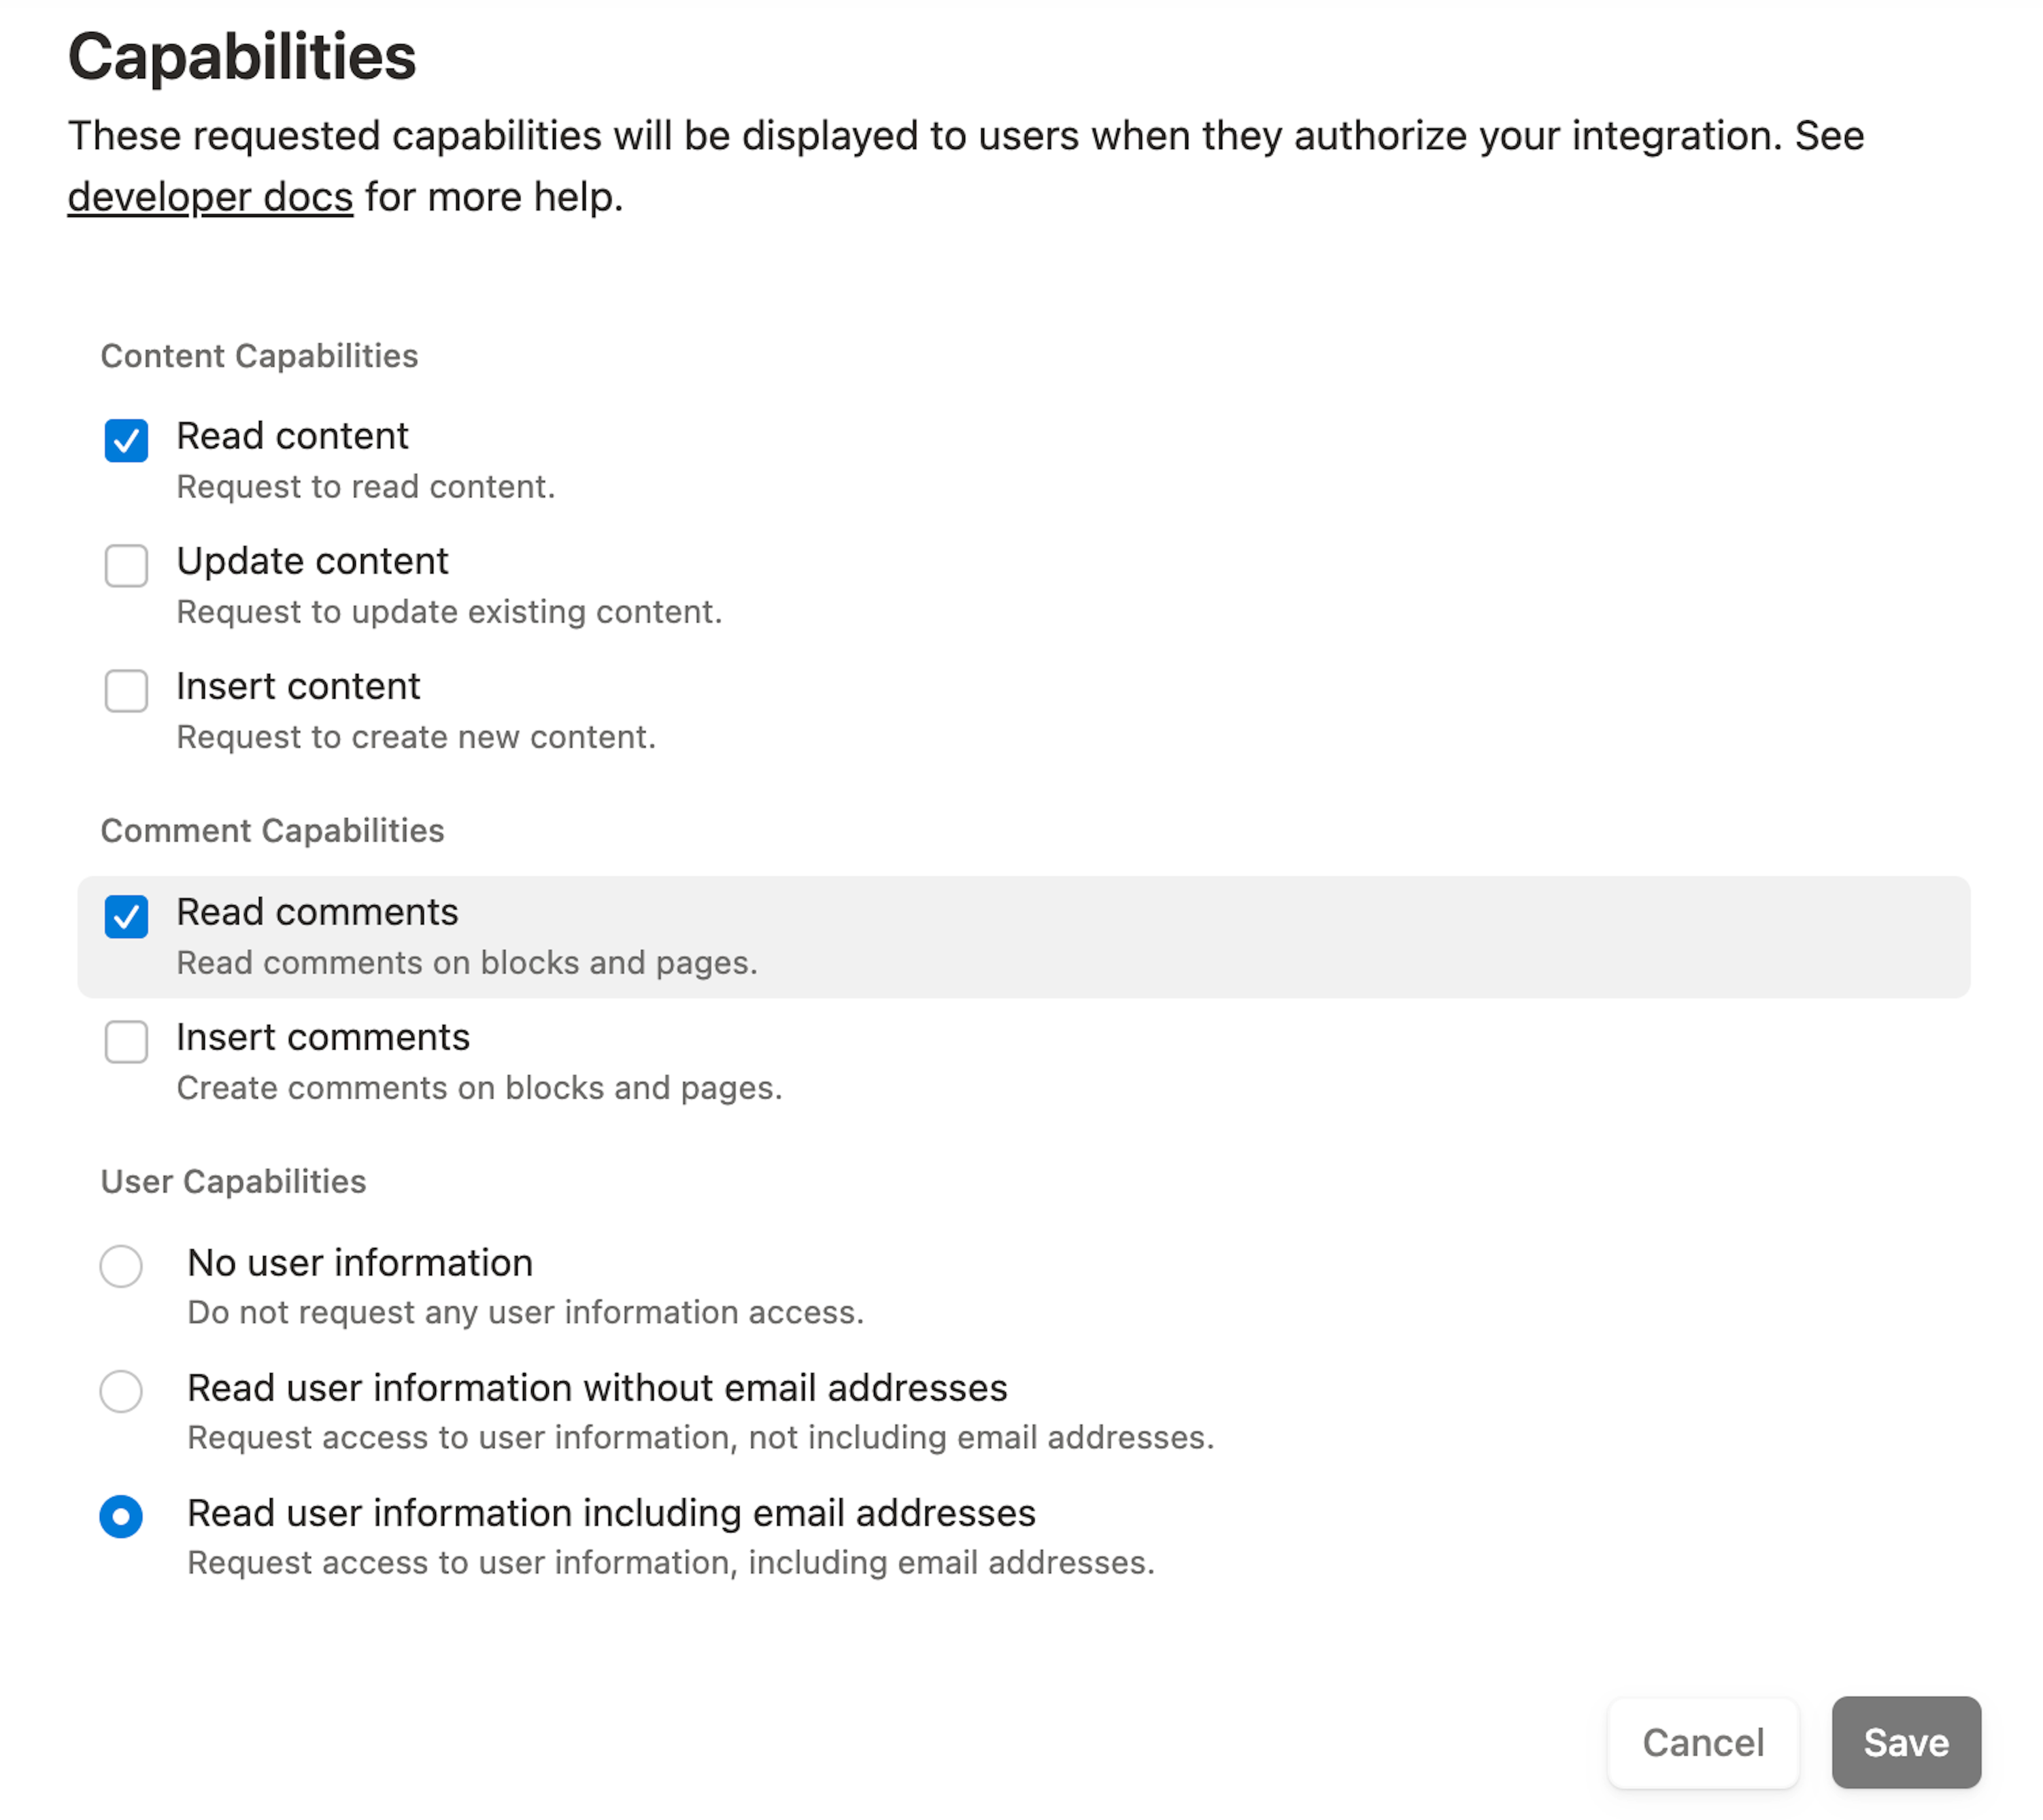
6. Check the following boxes in the integration settings as shown in the image below:
- Read content.
- Read comments.
- Read user information, including email addresses.
7. Click "Save."
Connecting Enji integration to projects
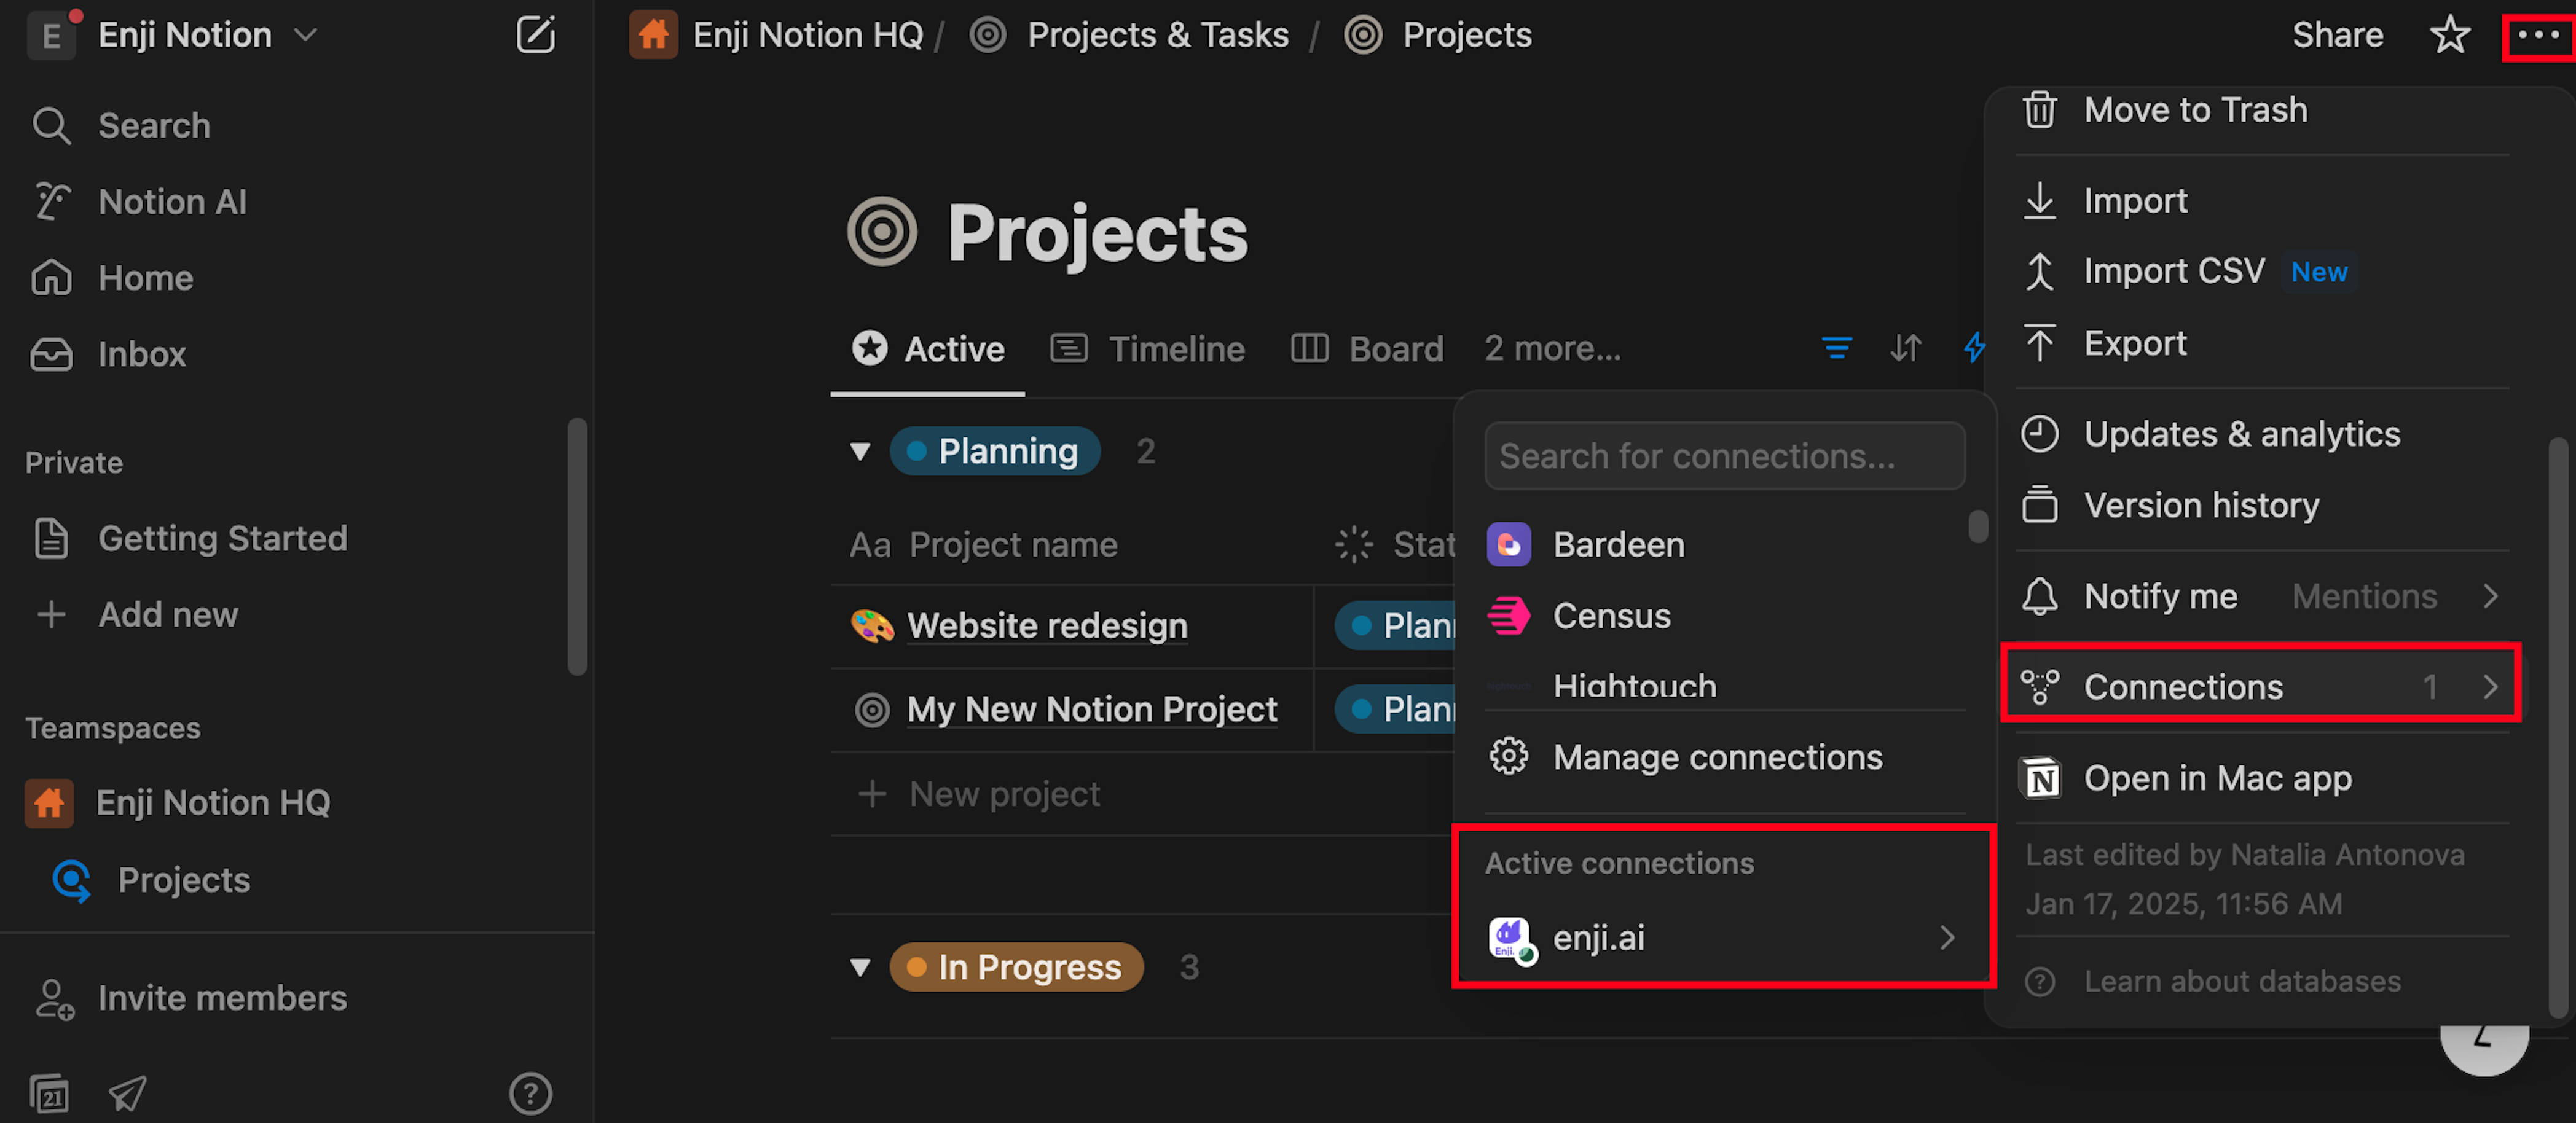
1. Select the "Projects" section from the main menu on the left of the Notion workspace's main page.
2. In the upper right corner, click … / Connect to / Select the integration that was created by name.
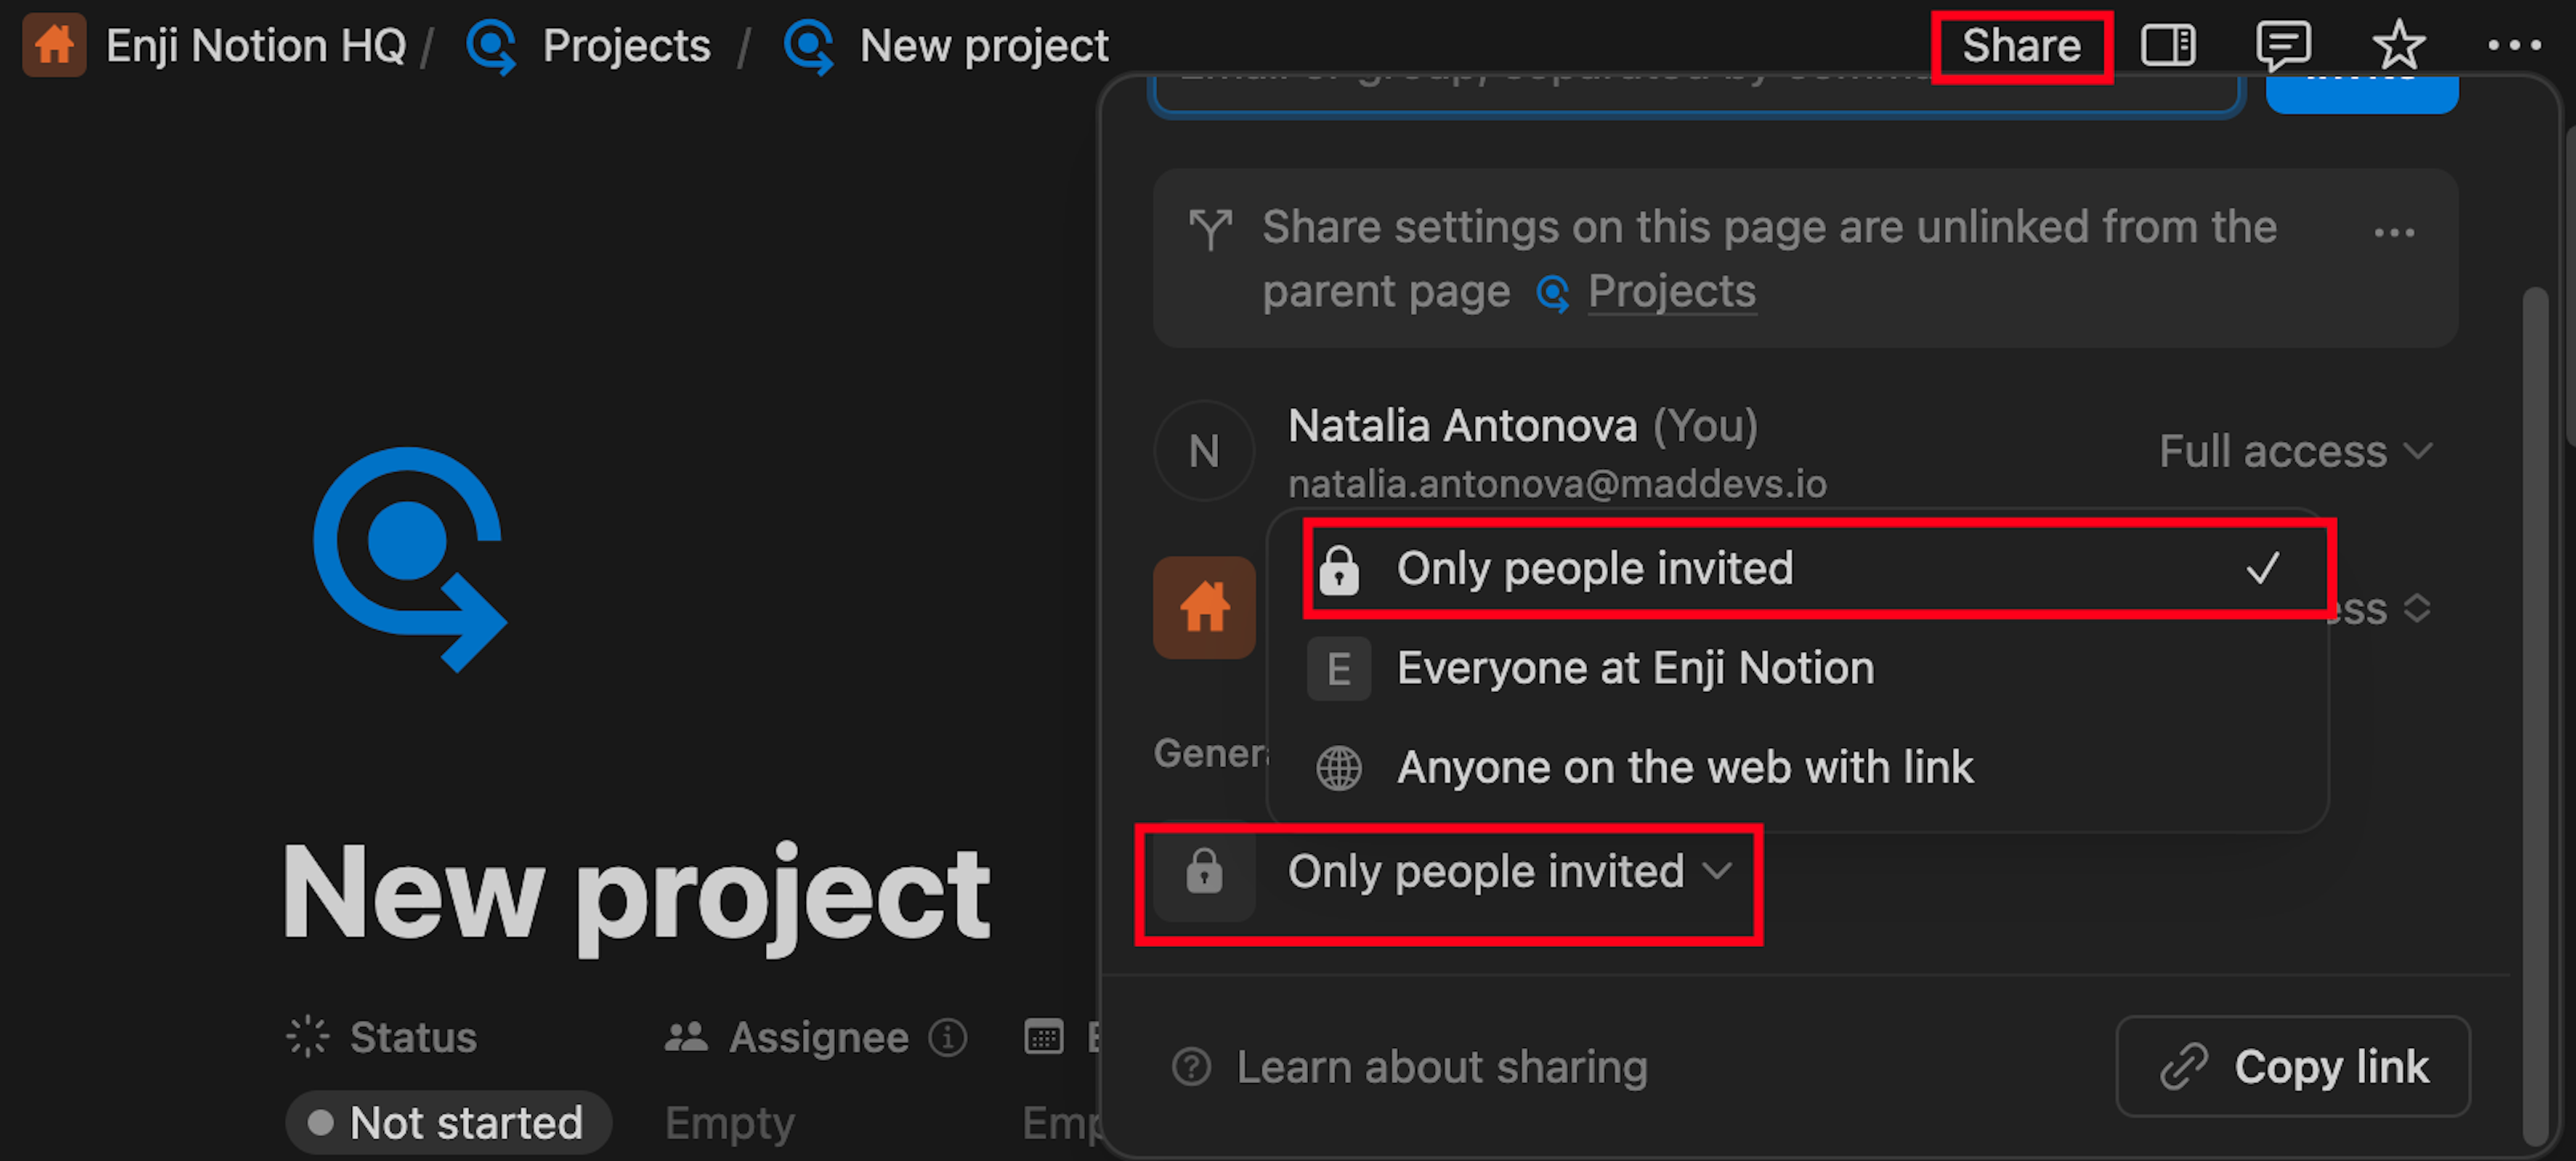
If a project has access restrictions such as "Invite only" or "Anyone with link at…" the integration must be connected separately. To do this, go to the project, click on the "…" in the upper right corner, select "Connect to," and choose the integration that was created.
Connecting Enji integration to tasks
Now, the integration needs to be set up for tasks in the same way.
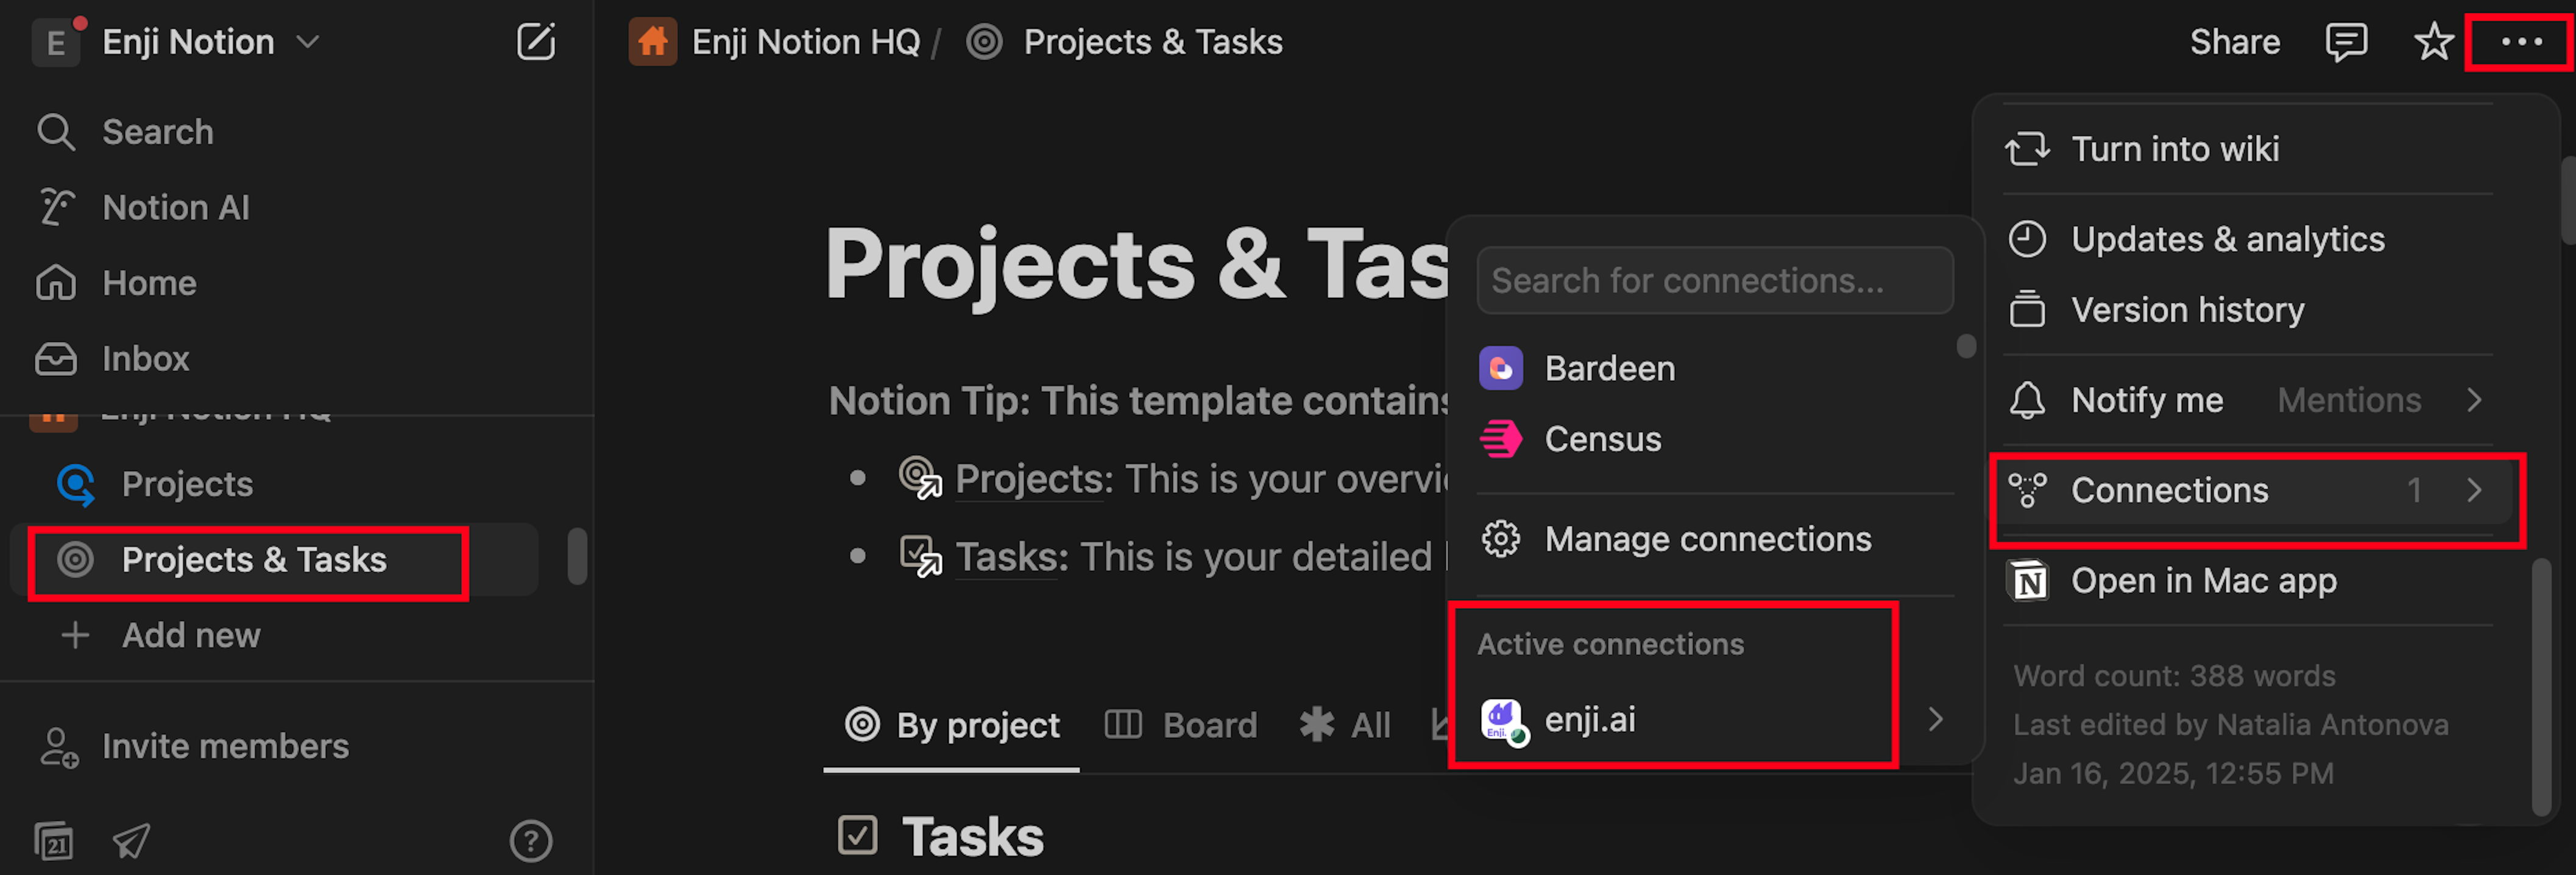
1. On the main page of the Notion workspace, select the "Tasks" section from the main menu on the left.
2. In the upper right corner, click … / Connect to / Select the integration that was created by name.
3. Click the "Confirm" button to confirm the integration.
Copy the token
The workspace is now set up for integration! Copy the token that will later be used to connect the Notion Project with a project in Enji. Do this by selecting the "Settings & members" section from the main menu on the left, then go to "Connections," click "…" and choose "Copy internal integration token."
Create a PM Site and link Notion to the Enji project
PM Site
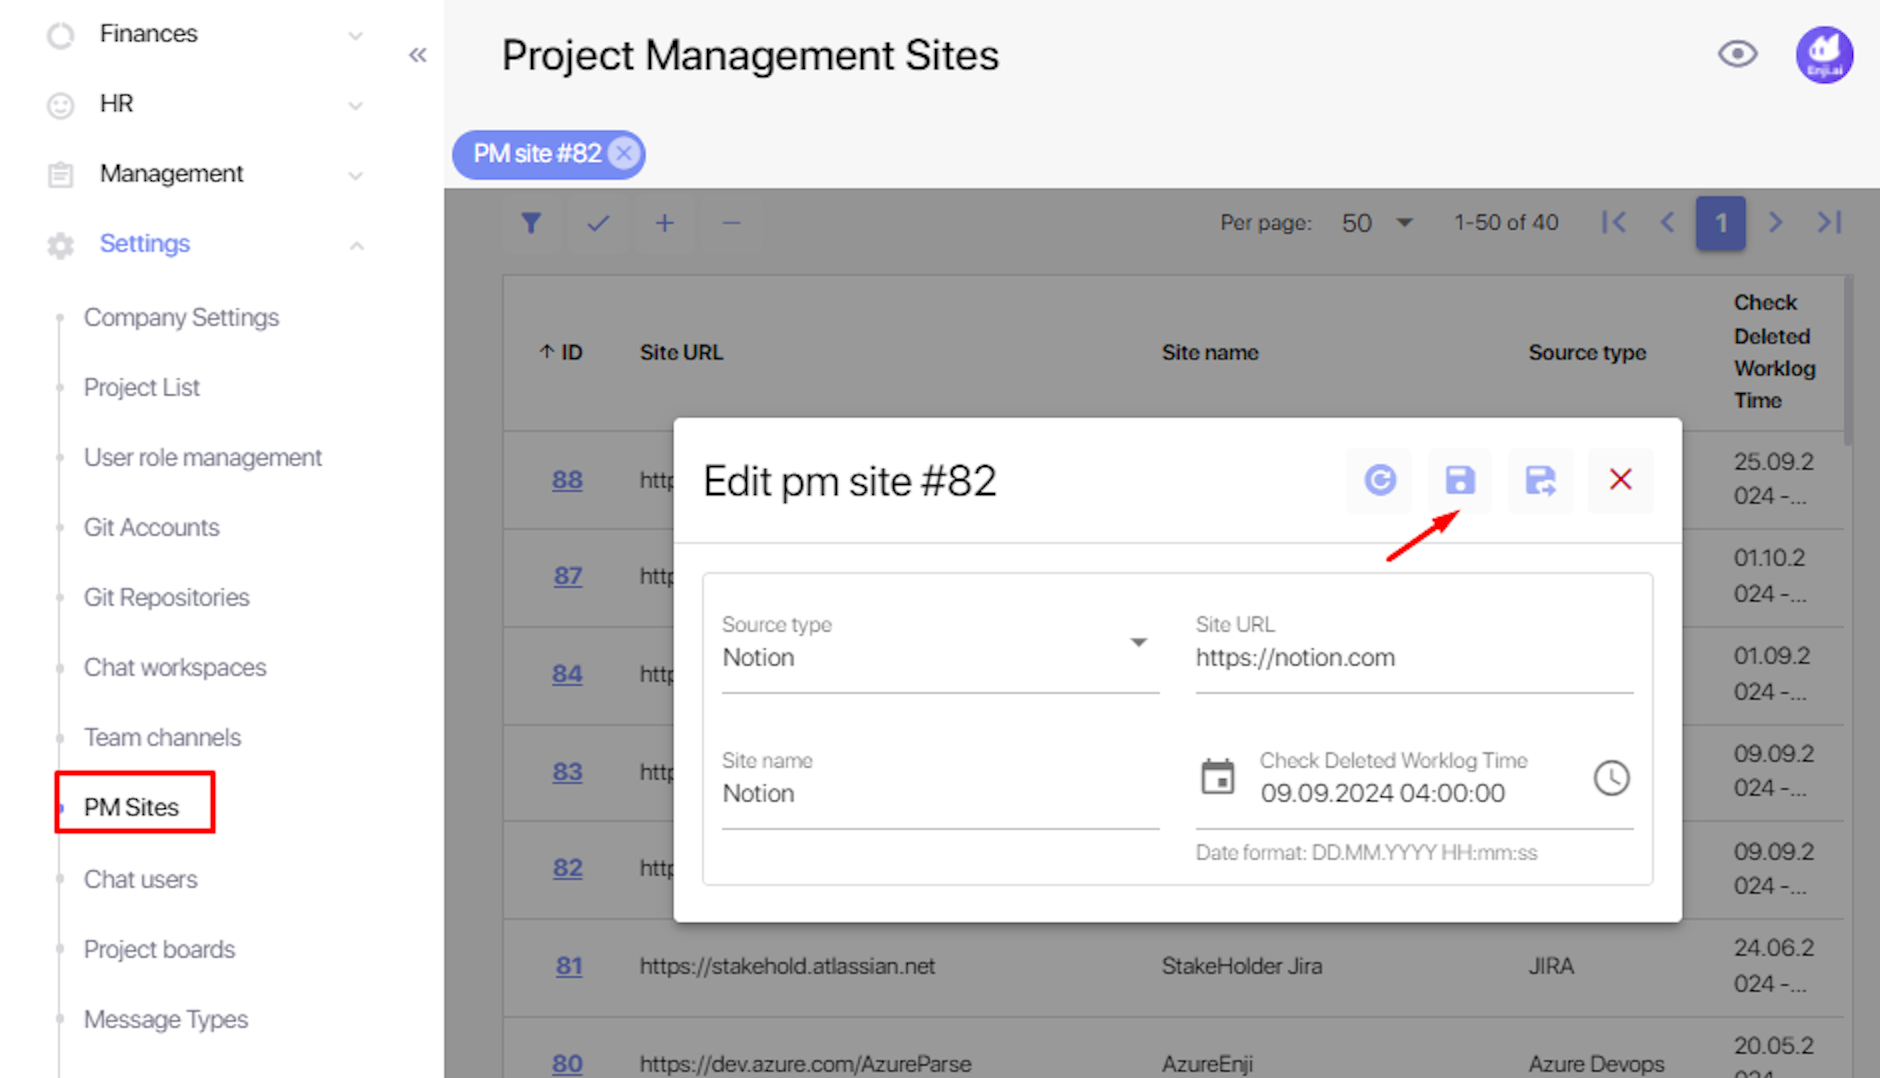
1. Open Settings -> PM Sites and select "+". Complete the form fields:
- Source type: Notion.
- Site name: Notion.
- Site URL: https://notion.com.
2. Click Save.
Link Notion to the Enji Project
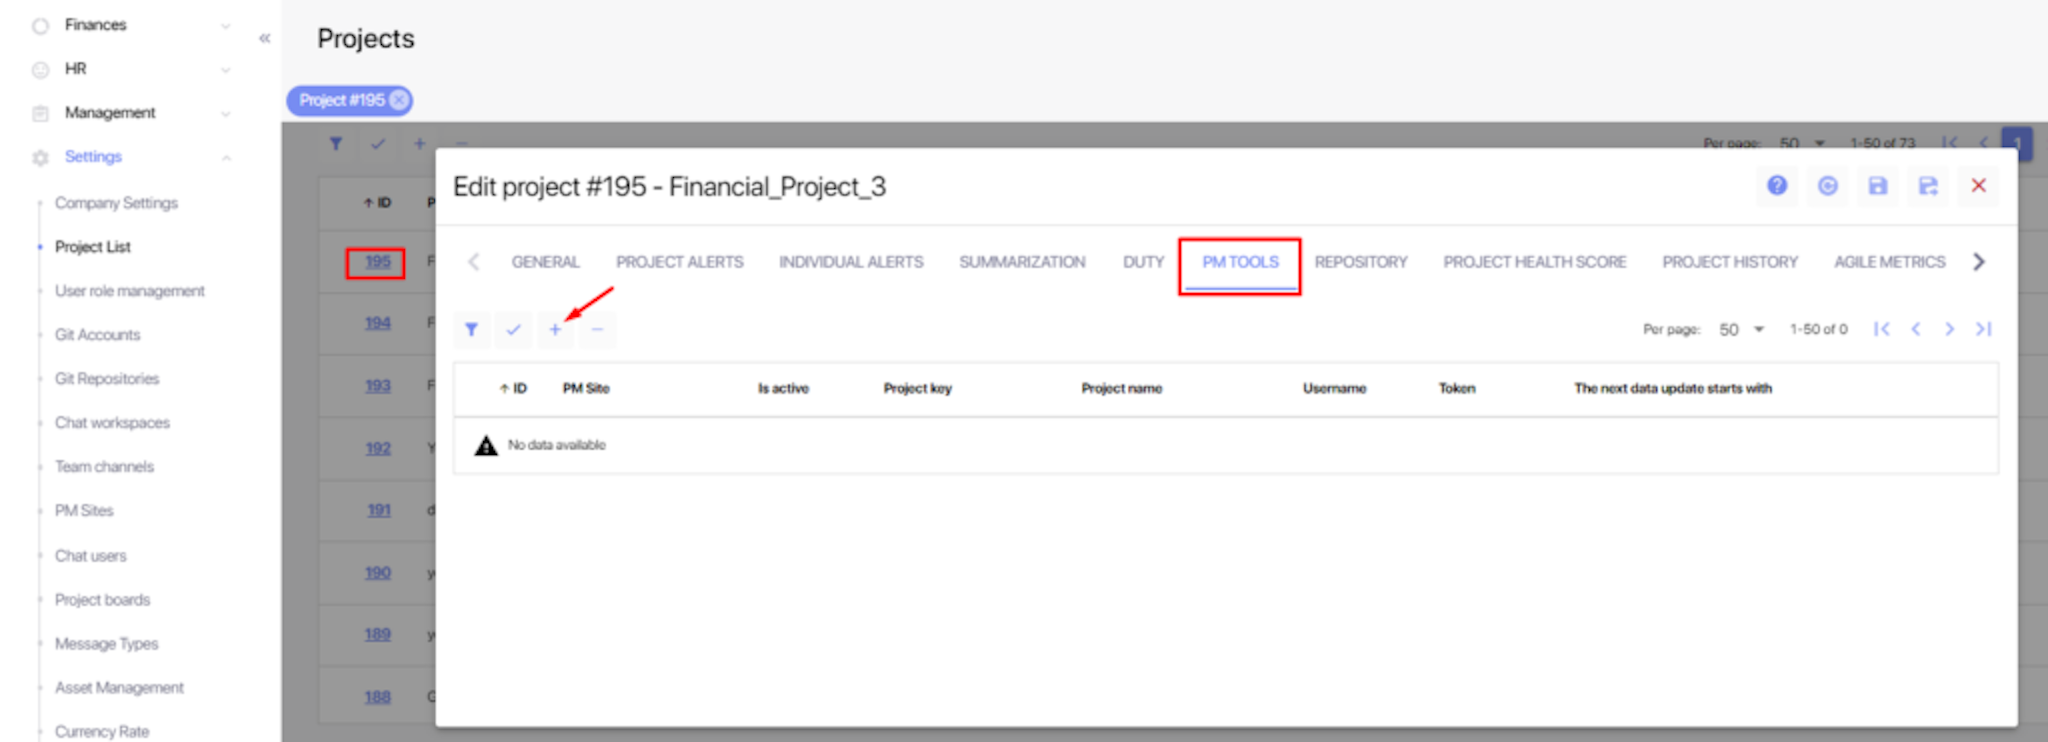
1. Open Settings -> Project List and click a Project ID. Go to the PM Tools tab and select "+".
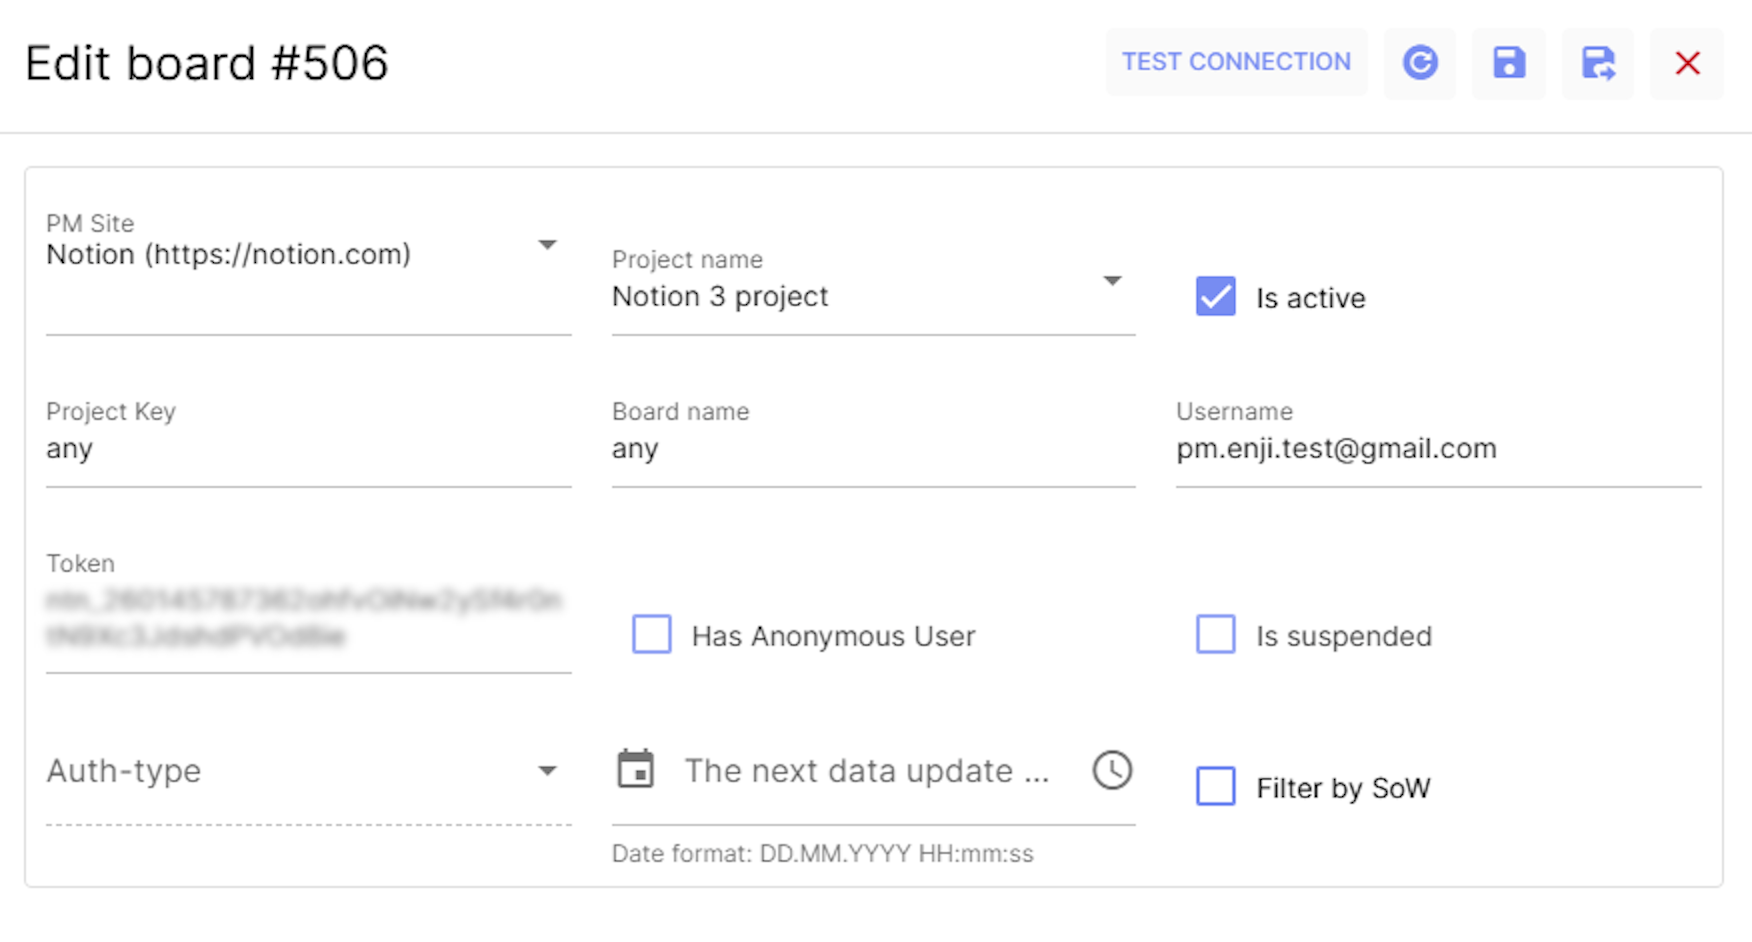
2. Complete the form:
- PM Site: Select "Notion."
- Project name: Choose your project.
- Project key: type “any”.
- Board name: type “any”.
- Username: Enter the user's email address.
- Token: Provide the Project Token generated in Notion in step 1 of this guide.
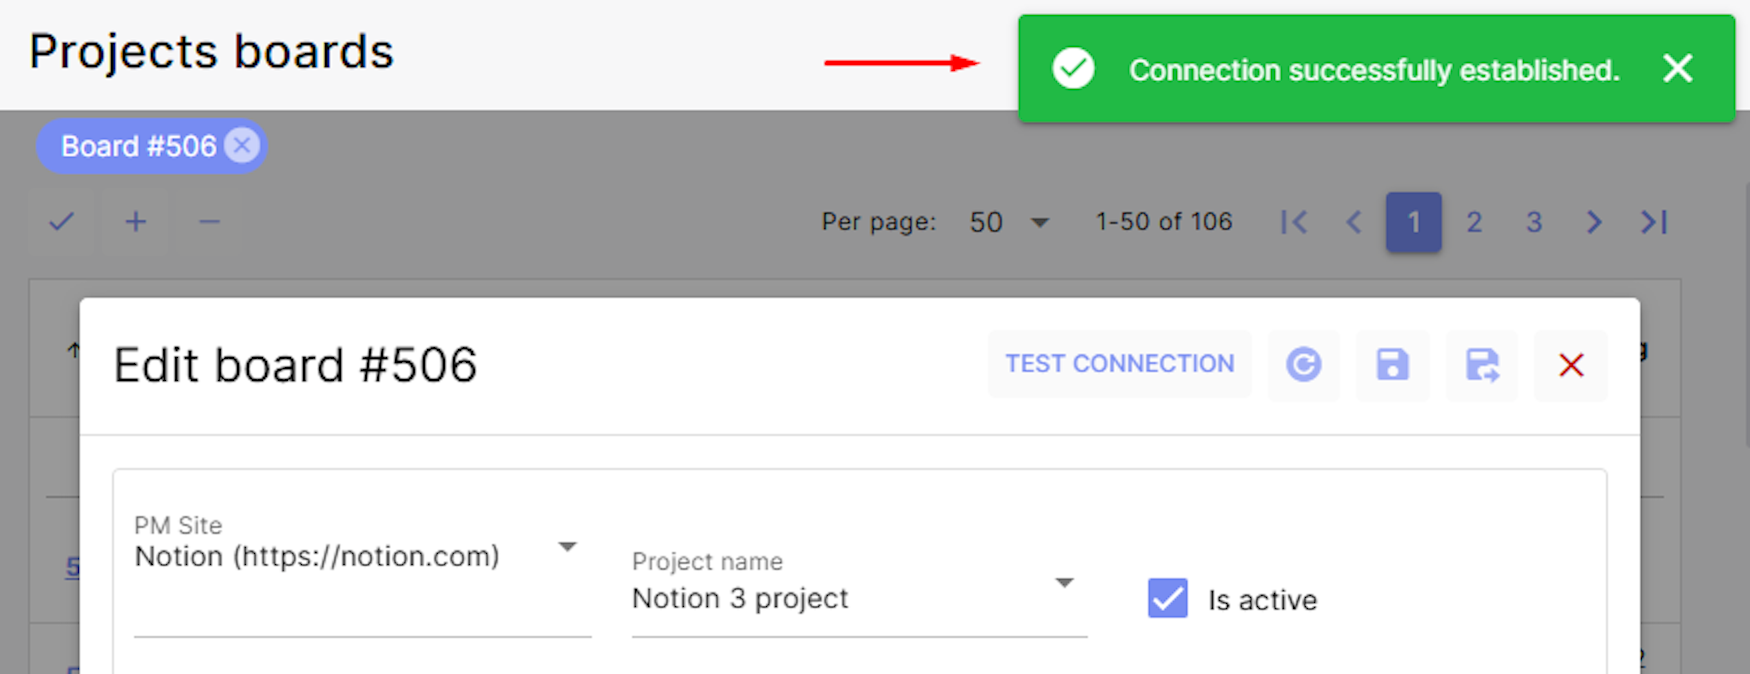
3. Click the Save Changes button, and then click Test Connection. A notification should appear saying, "Connection successfully established."
Parser processes run every 2 hours, parsing data from Notion into Enji.
Configuring projects and tasks in Notion for proper display in Enji
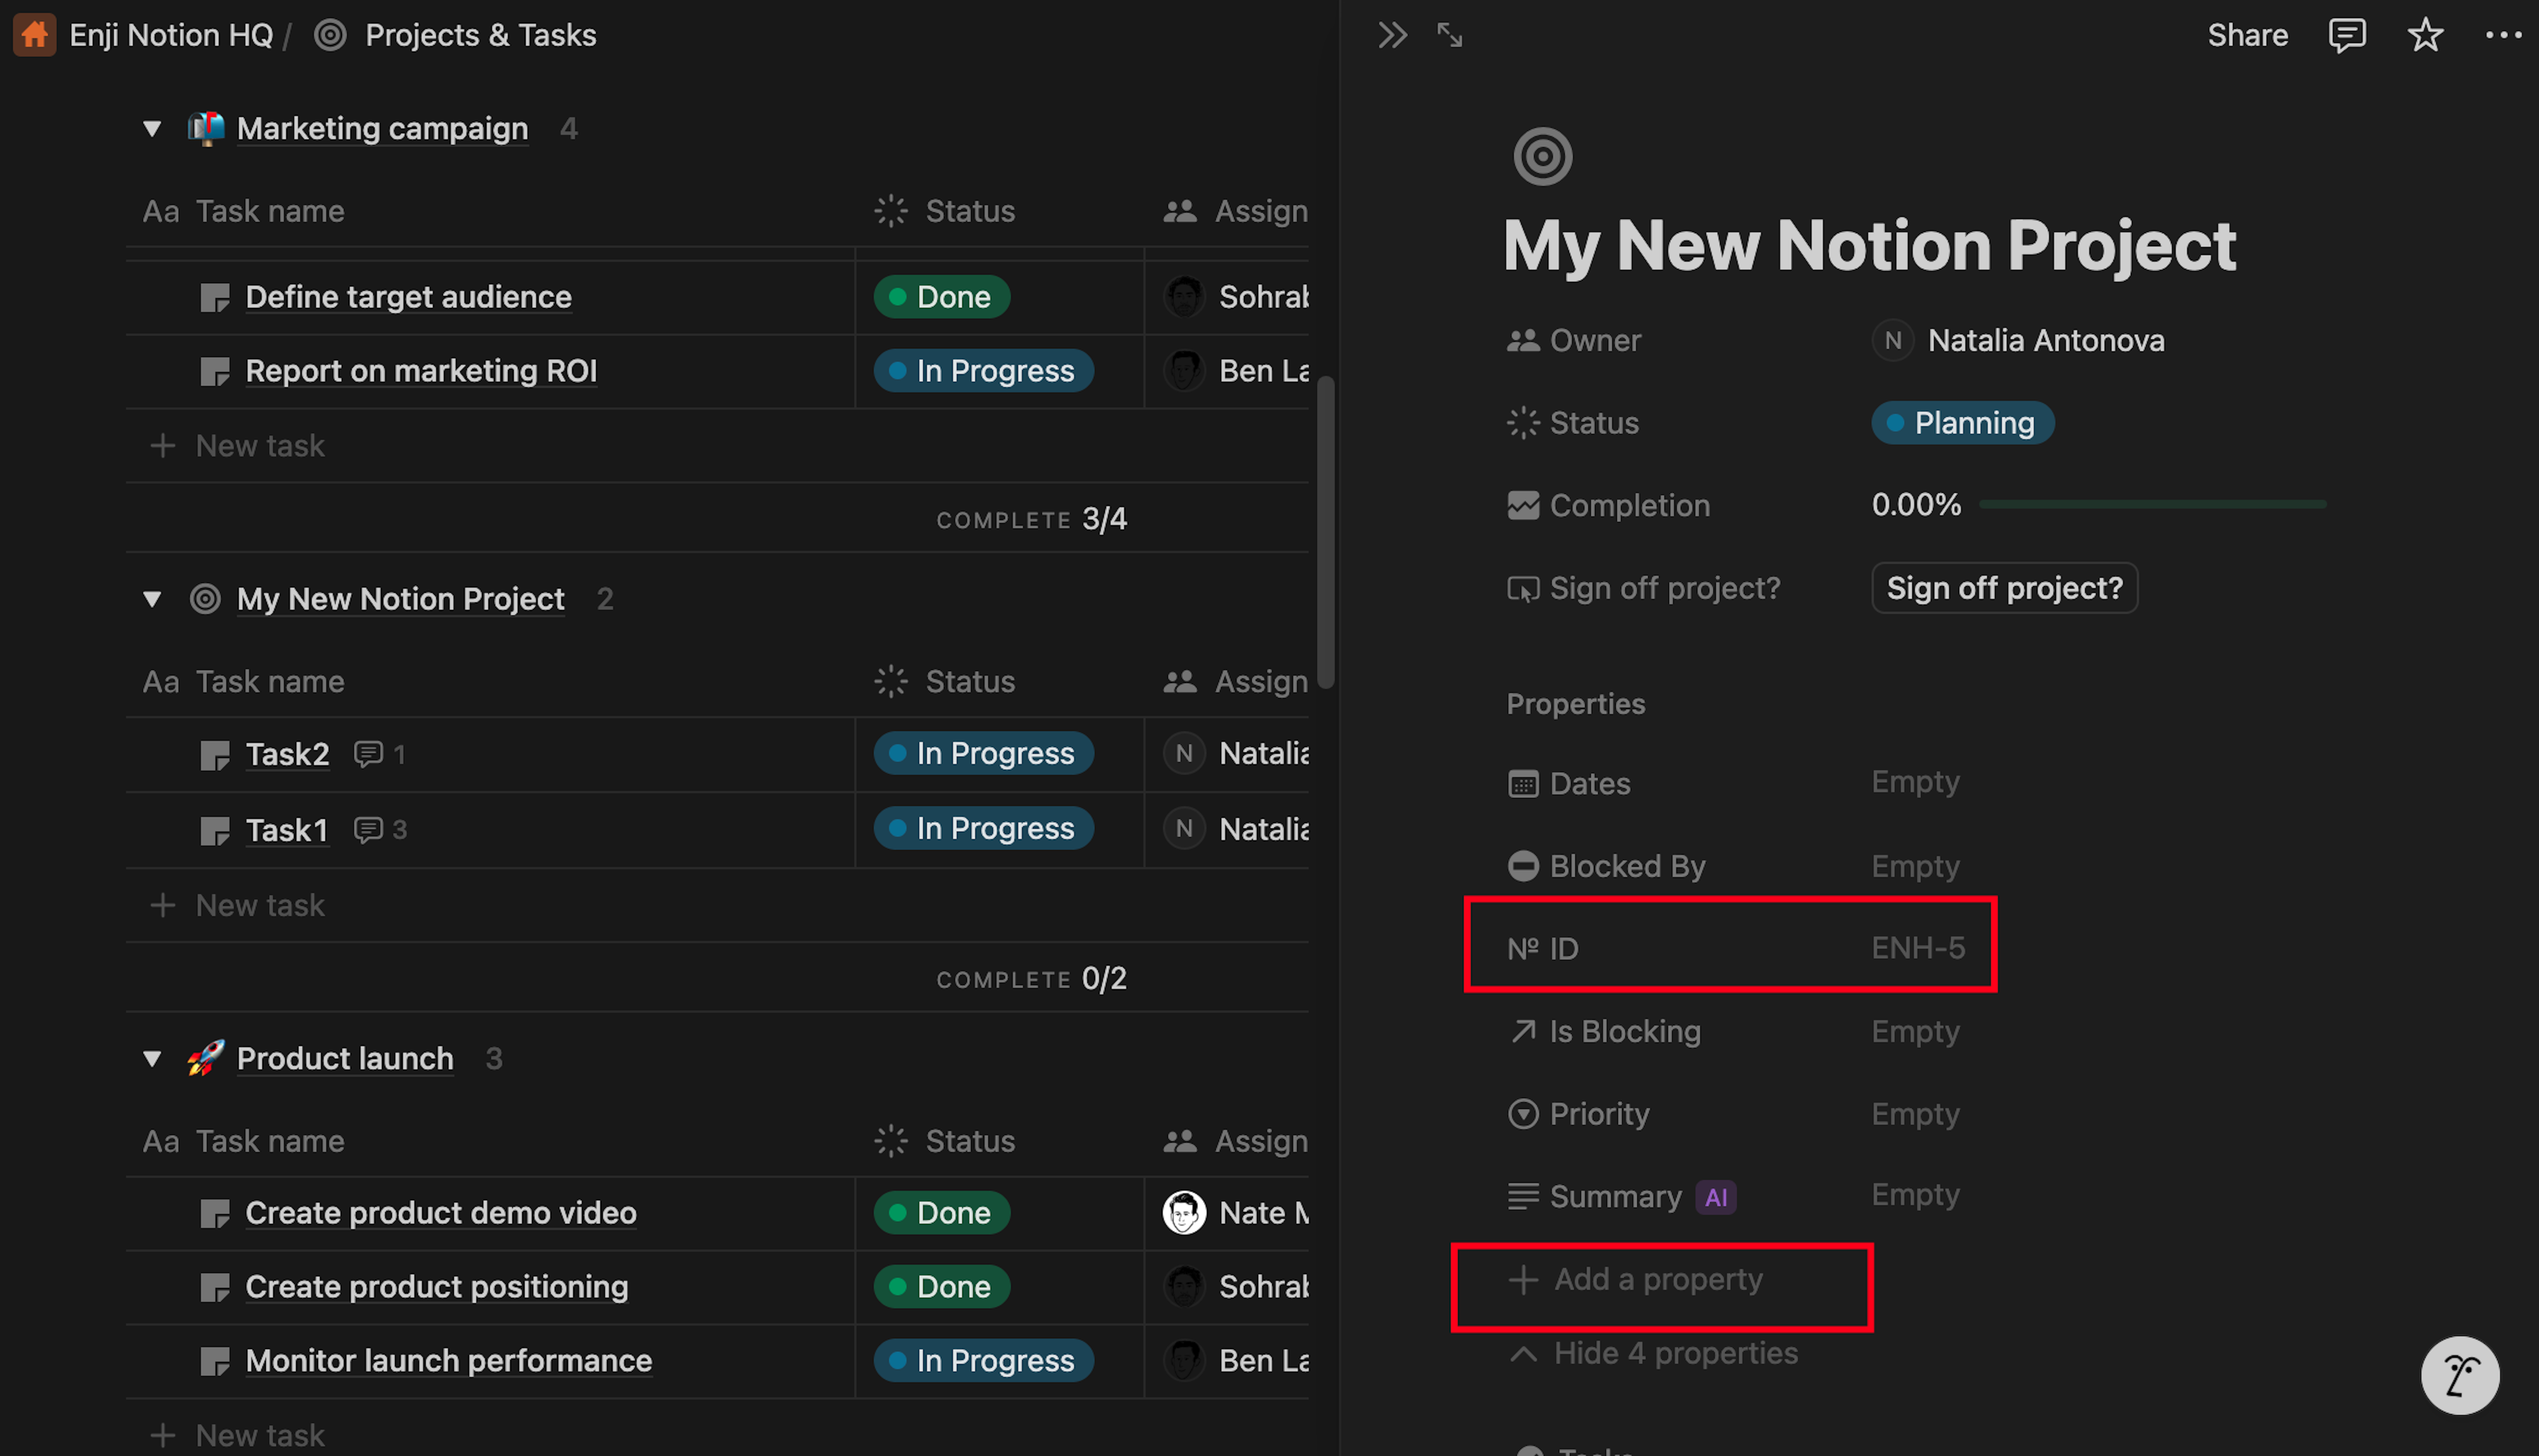
In the Notion project, add a Property / ID, which is the identifier used by Enji. The ID is added once and is automatically generated thereafter.
To add this property in Notion:
1. Open the project in Notion.
2. Select the "+ Add a property" button.
3. Select ID from the list (the ID will then appear among the project properties, as shown in the screenshot below).
When tasks are parsed in Enji, the task name and its ID from Notion will be displayed.
The worklog format in Notion
In Notion, a worklog is created within a comment. To ensure the comment is recognized as a worklog, we use a strict format. Worklog elements must be listed in the following order: $enji dd-mm-yyyy hh:mm work log text:
1. @enji, #enji, $enji: A tag that converts the comment into a worklog. Use any of these symbols (@, #, $) to create the tag.
2. DD-MM-YYYY: The date for which the worklog should be recorded (e.g., if logging yesterday’s work today). The date must follow this format: DD-MM-YYYY (day-month-year, separated by hyphens).
02-07-2024 is the correct format
02-07-24 is the incorrect format
3. H:H, HH:HH: The time spent on the task. It must be written with a colon ( : ). For example, 1:30 and 01:30 both represent one hour and thirty minutes, while 1:3 represents one hour and three minutes.
