How to Connect a Jira Project
This article explains how to add a Jira Project to an Enji project to build project reports. When connected to the task-tracking system, Enji receives regular updates in the form of task activities.
How to add a Jira project:
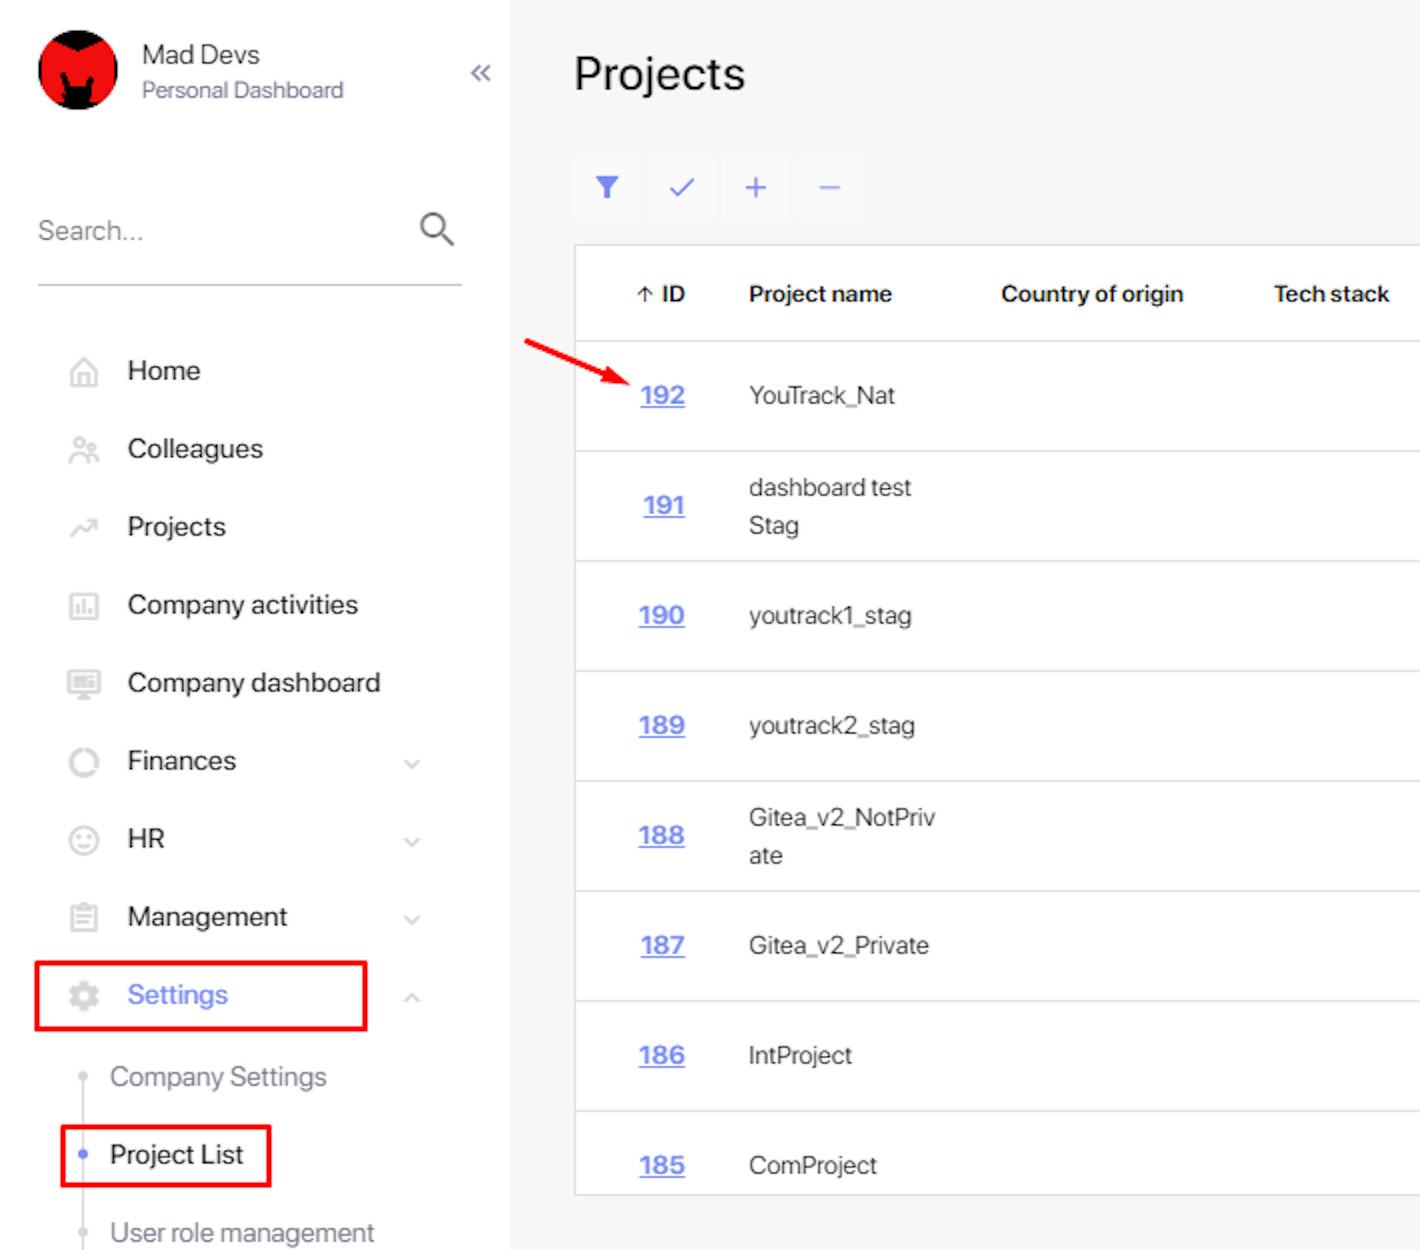
1. In the Enji -> Settings -> Project List, click on the ID of the desired project.
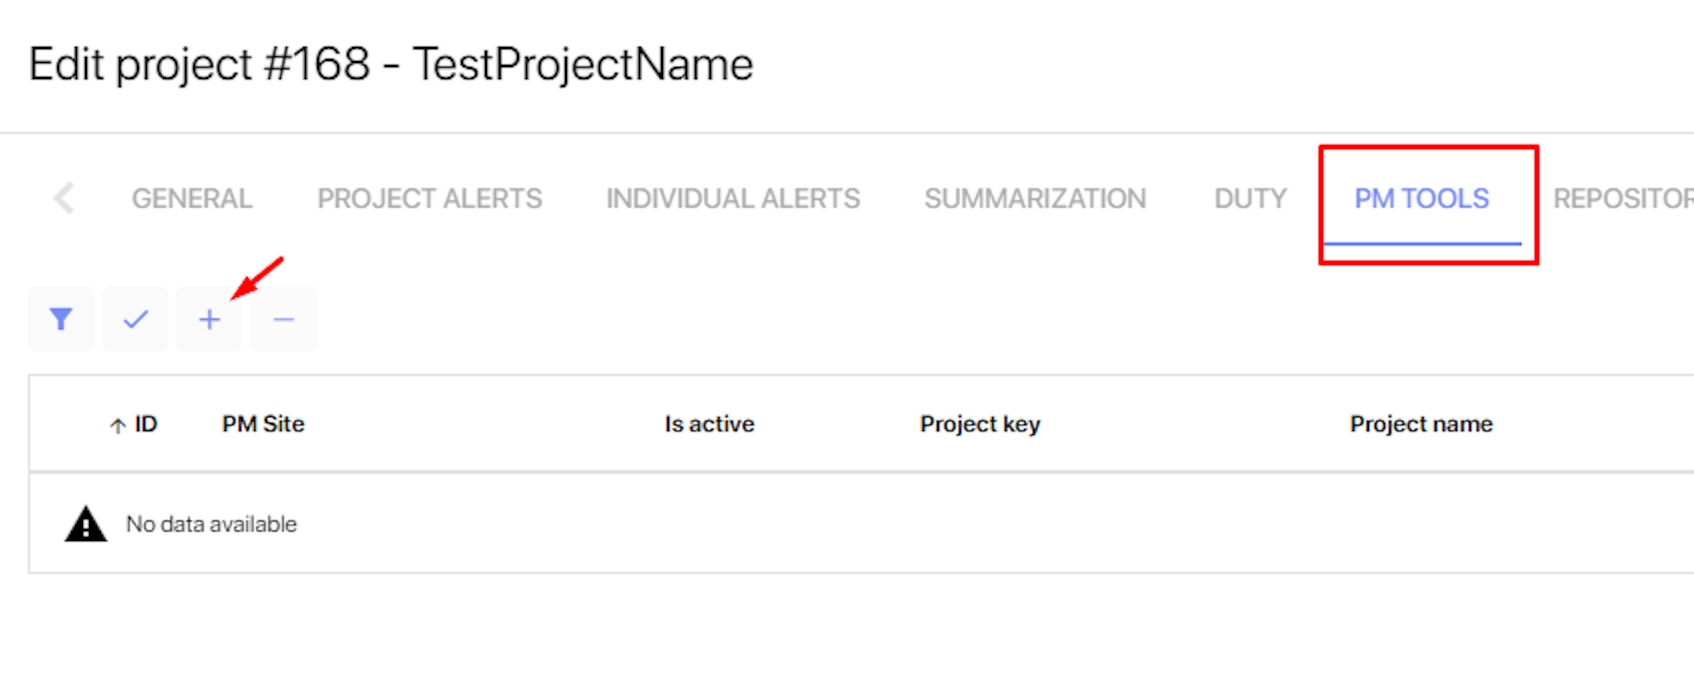
2. Go to the PM Tools tab and select "+".
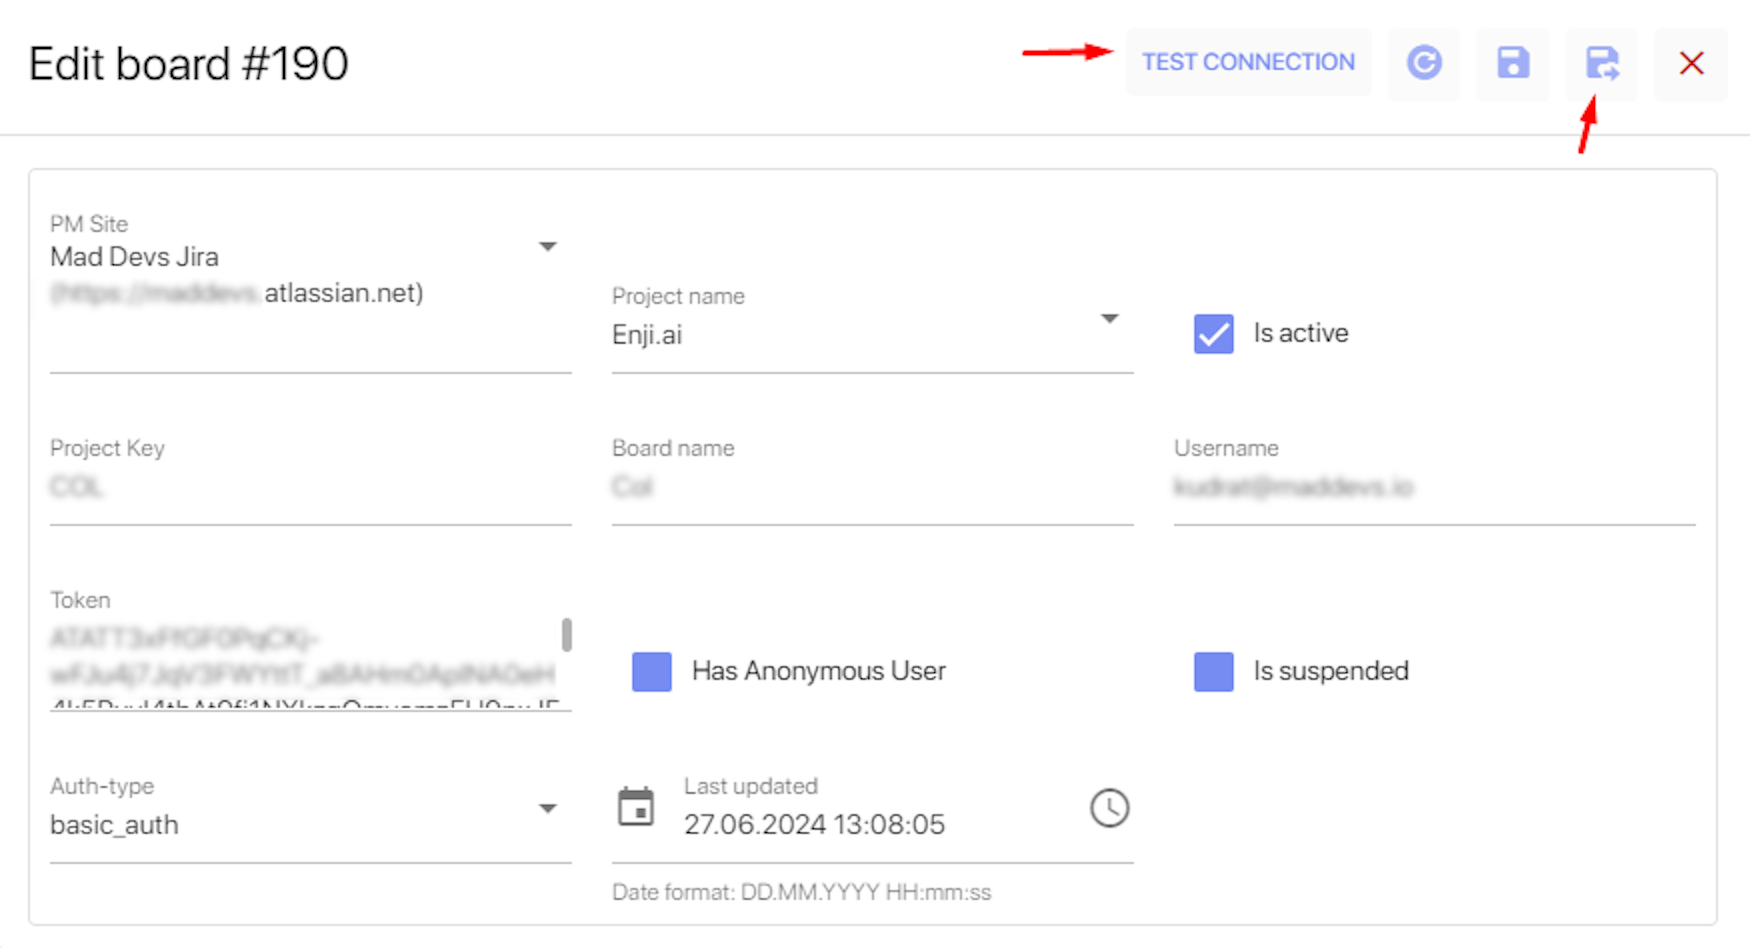
3. Complete the fields:
- PM Site: Choose the relevant Jira PM Site from the drop-down list. Add a new PM Site if you do not find a corresponding source in the list.
- Project Key: Enter the project indicator/key, e.g., COL, PC, TEST. You can find the proper project key in URL that leads to your Jira Project board. For example:
https://yourcompany.atlassian.net/jira/software/projects/COL/boards/1 - Username: Insert a username from the Jira account.
- Token: For Cloud JIRA, use the API Token**. For Server/Datacenter Jira, use the account password.
**To generate a token, go to the page, create a token, and copy it. - Is active: Check the box.
- Auth-type: Choose the authentication type. For Cloud Jira, use basic-type. For Server/Datacenter Jira, use session_type.
The API Token must be generated by a user with access to the Jira Project.
4. Click the Test Connection button to make sure the connection can be established with the access data filled in. If OK, click Save.
Parser processes run every 2 hours, parsing data from the Jira Project into Enji.
If data still does not appear on the Project -> Worklogs page after an hour, a manual account mapping may be necessary.


